2 Ingredient Peanut Butter Fudge


This post may contain affiliate links. Please read our full disclosure policy.
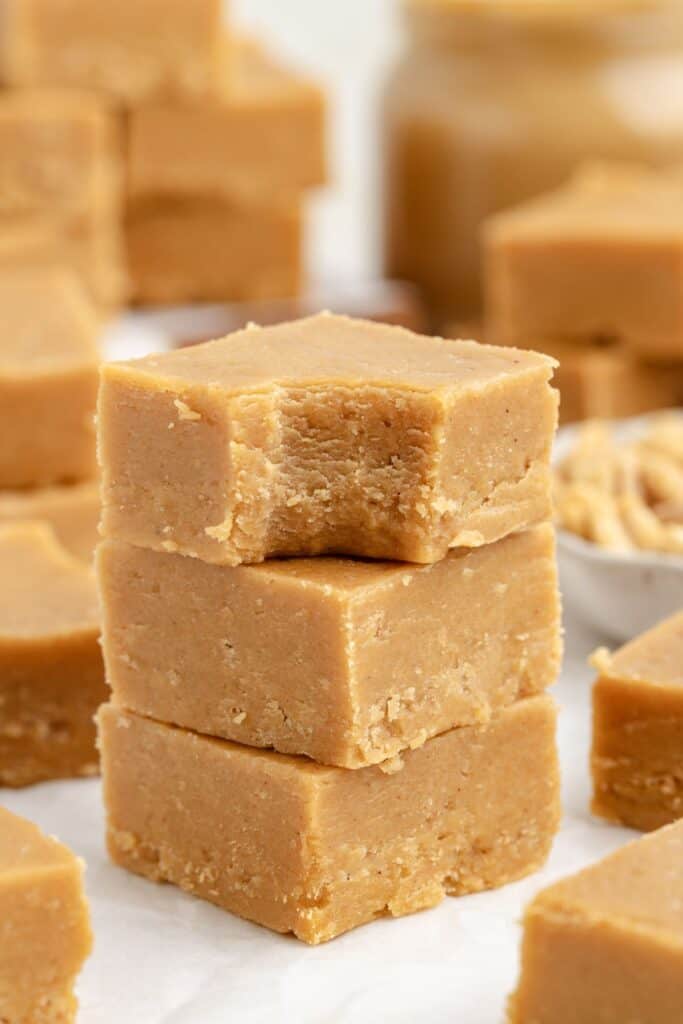
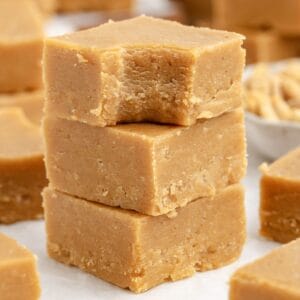
Make this 2-ingredient peanut butter fudge in minutes using only a jar of peanut butter and a tub of vanilla frosting. It sets up perfectly in the fridge and has a smooth, creamy texture without any stovetop cooking.
Microwave Peanut Butter
I honestly think this might be one of the easiest desserts on the whole blog. It’s only two ingredients and takes less than five minutes of actual hands-on time. The hardest part is lining the pan, and even that’s not too bad.
Once it’s in the fridge, the hard part is over! It tastes like classic peanut butter fudge without all the usual steps. If you’ve got a microwave and a sweet tooth, you’re good to go.
Lately, I’ve been deep in a peanut butter dessert phase. Between my Fluffernutter Cookies and Peanut Butter Blossoms, it’s safe to say I’m on a roll. I kept seeing versions of this two ingredient fudge recipe and finally had to give it a try. It’s such a great way to fix a fudge craving fast!. No candy thermometer, no stovetop stirring, just creamy peanut butter, a tub of frosting, and a few minutes of your time.

Ingredients
- Creamy peanut butter – Gives the fudge its smooth, rich texture and classic peanut butter flavor. Use no-stir, shelf-stable brands like Jif or Skippy for the best results. Avoid natural peanut butters.
- Vanilla frosting – Adds sweetness and structure, helping the fudge set firmly without cooking.

How to Make Peanut Butter Fudge with Frosting
- Prep – Line an 8×8-inch baking pan with parchment paper, leaving some overhang on the sides for easy removal.
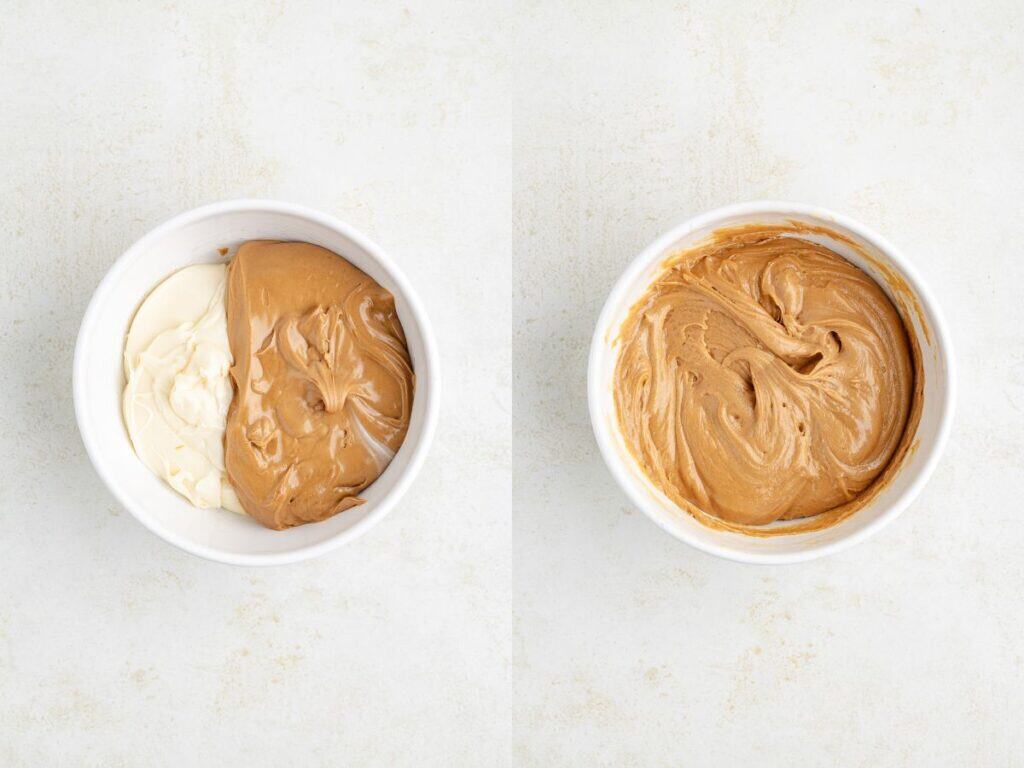
- Melt – In a large microwave-safe bowl, microwave the peanut butter and vanilla frosting for 30 seconds.
- Stir – Stir the mixture, then microwave for another 15 to 30 seconds until smooth and thoroughly combined.
- Pour – Spread the mixture evenly into the prepared pan and smooth the top with a spatula.
- Chill – Refrigerate for 1 to 2 hours, or until the fudge is firm and set.
- Slice – Use the parchment overhang to lift the fudge from the pan. Cut into squares and serve.

Variations and Substitutions
- Chocolate peanut butter fudge – Use chocolate frosting instead of vanilla for a chocolate-peanut butter twist.
- Crunchy texture – Use crunchy peanut butter for added texture throughout the fudge.
- Topping ideas – Sprinkle mini chocolate chips, chopped peanuts, or flaky sea salt on top before chilling.
- Almond or cashew butter – Swap in shelf-stable almond or cashew butter for a different flavor profile. Make sure it’s not a natural or oil-separated variety.

Tips for Success
- Use shelf-stable peanut butter – Brands like Jif or Skippy give the best texture. Natural peanut butter can cause the fudge to separate and become oily.
- Line the pan fully – Make sure your parchment paper covers the bottom and sides of the pan. This makes lifting and slicing much easier.
- Work quickly after melting – Once melted and smooth, pour the mixture into the pan right away before it starts to thicken.
- Chill until fully set – The fudge needs time in the fridge to firm up properly. Don’t rush this step, or it may be too soft to slice cleanly.

Want to be the first to know when the next easy recipe is published? Sign up for our newsletter updates below.
More Easy Two-Ingredient Desserts
Keep things simple with these recipes that skip the extras but still deliver on flavor.
Did you love this no bake peanut butter fudge? Please leave a star rating and share your thoughts in the comments below.
Easy Peanut Butter Fudge Recipe
Ingredients
- 1 (16-ounce) jar creamy peanut butter Jif or Skippy recommended (Do not use natural)
- 1 (16-ounce) tub vanilla frosting
Instructions
- Line an 8×8-inch square baking pan with parchment paper, leaving some overhang on the sides.
- In a large microwave-safe bowl, combine the peanut butter and frosting.
- Microwave for 30 seconds, then stir.
- Microwave again for 15 to 30 seconds until smooth and fully combined.
- Pour the mixture into the prepared pan and spread evenly with a spatula.
- Refrigerate for 1 to 2 hours, or until firm.
- Lift the fudge from the pan using the parchment paper, then slice it into squares.
Notes
- Be sure to use shelf-stable peanut butter. Natural peanut butter will affect the texture.
- Store the fudge in an airtight container in the fridge for up to 1 week. Keep parchment paper between layers to prevent sticking.
- Freeze for up to 3 months in a freezer-safe container. Thaw in the refrigerator before serving for the best texture.
- This fudge can sit out at room temperature for a few hours, but it softens quickly. Refrigeration is best if you want clean slices or plan to store it longer.
Nutrition
Disclaimer: Nutrition information is estimated based on automated calculations and should be considered as an approximation. These estimates are provided as a courtesy. Please use your own brand’s nutritional values to verify accuracy.