Ice Cream Cone Cake Pops


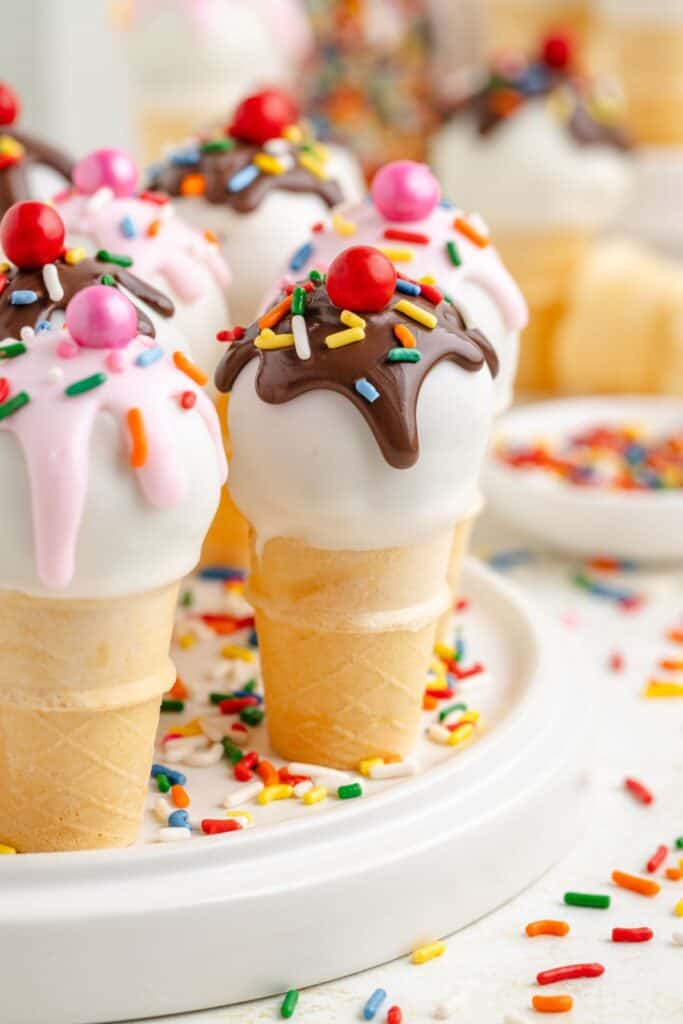
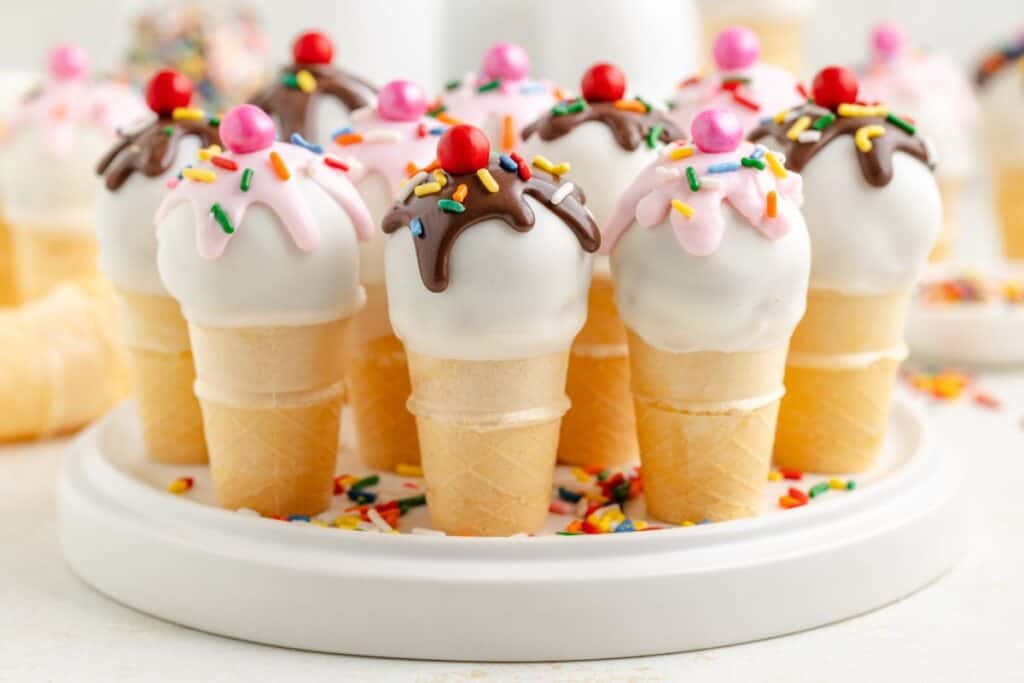
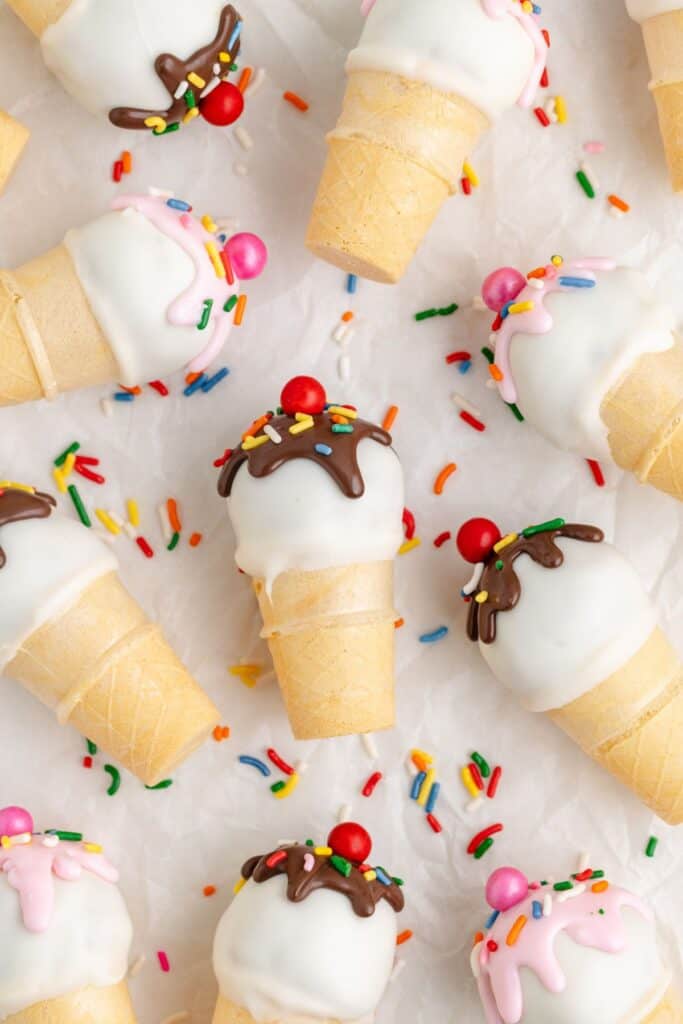
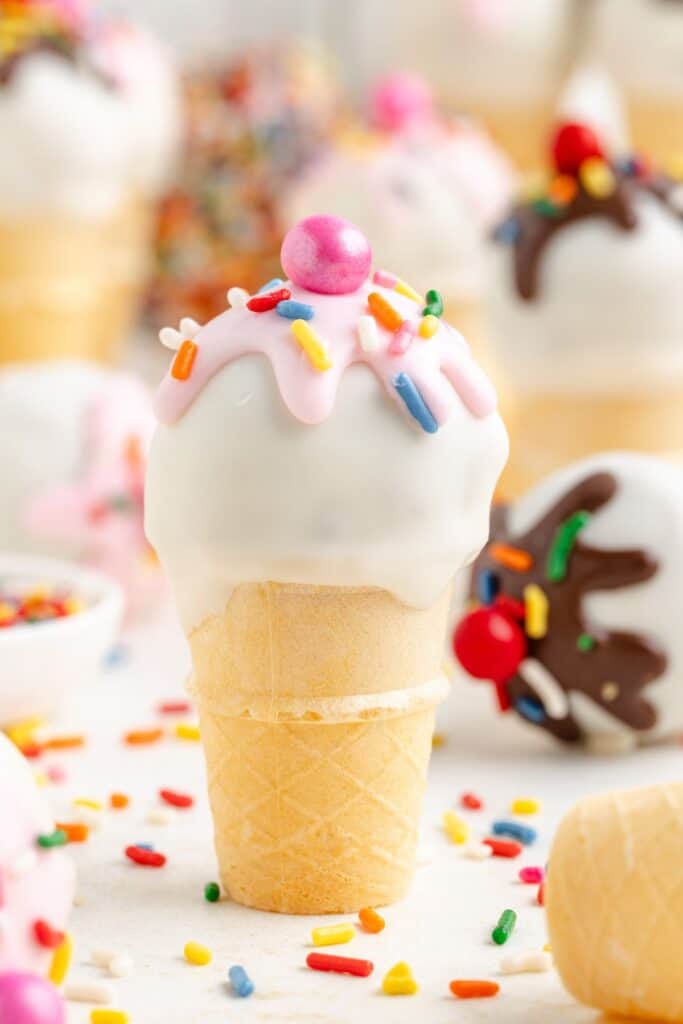
These Ice Cream Cone Cake Pops look like mini scoops of ice cream served in cones but are made from crumbled cake, frosting, and a candy coating. They’re perfect for parties and bring a fun twist to traditional cake pops with their cone-shaped base and colorful decorations.
Cute Cake Pop Ice Cream Cones
It’s no secret that I’m a sucker for anything cute; just take a look at my Nutter Butter Turkeys or Pencil Cookies. These Ice Cream Cone Cake Pops are right up my alley. I made them recently for my niece’s birthday, and they were such a hit. There’s just something so fun about desserts that double as decor, especially when they look like tiny scoops of ice cream.
One of the things I love most about this recipe is how simple it is. It’s actually even easier than dipping truffle balls like my Oreo truffles, since the cones give you a built-in handle. Plus, they’re endlessly customizable. You can swap out the candy melts, use different sprinkles, or change the “cherry” on top to match your party theme.
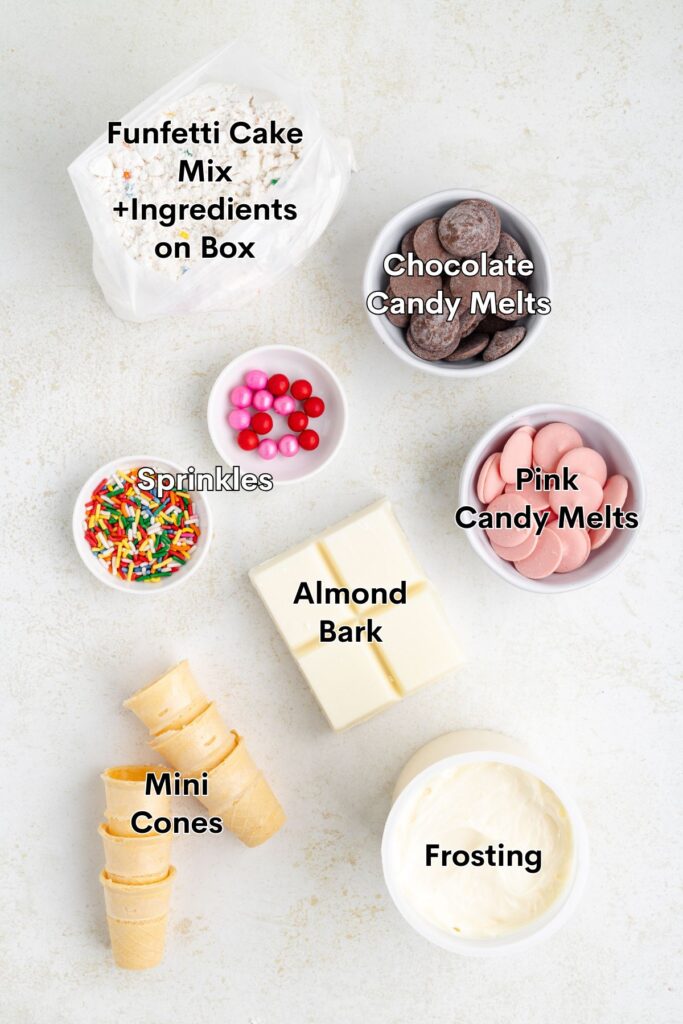
Ingredients
This post may contain affiliate links. Please read our full disclosure policy.
- Funfetti cake mix – Serves as the base for the cake pop mixture.
- Ingredients listed on cake mix box – Typically eggs, oil, and water to prepare the cake.
- Vanilla frosting – Binds the cake crumbs into a dough for shaping.
- Mini cup cones – Act as the “cone” base; I used these Joy Brand Mini Cups.
- Vanilla almond bark – Coats the cake balls to mimic vanilla ice cream.
- Melting wafers (chocolate and pink) – Create the look of fudge or strawberry sauce on top.
- Large round red or pink sprinkles – Resemble cherries for a classic ice cream topping.
- Rainbow sprinkles – Add fun and color, mimicking traditional ice cream toppings.
How to make ice cream cone cake pops
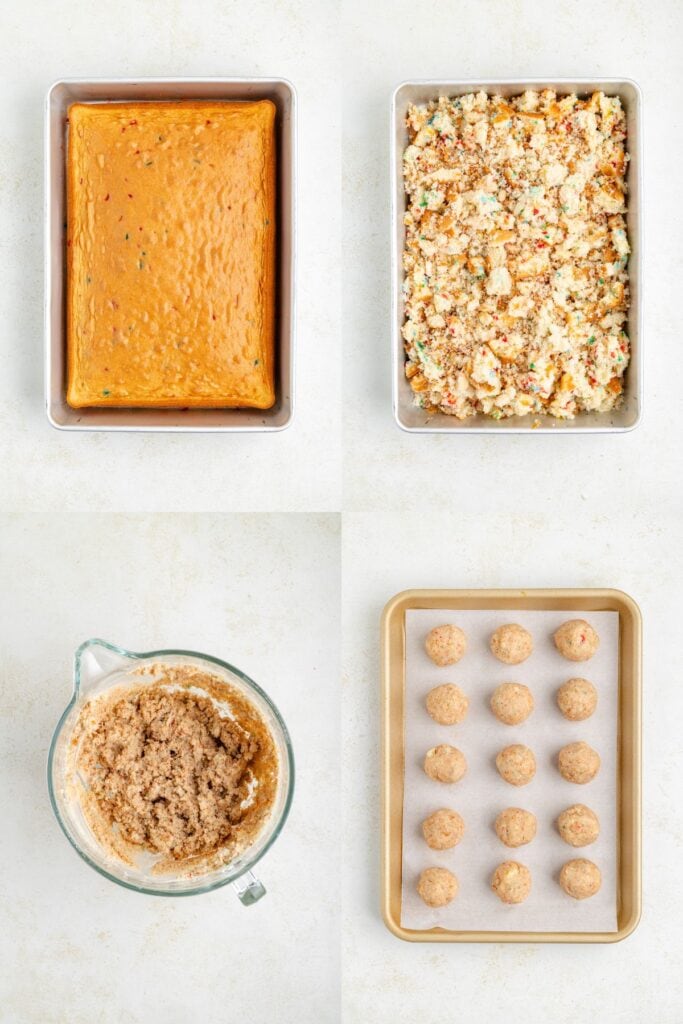
- Make the cake – Preheat the oven according to the cake mix instructions and bake the cake in a 9×13-inch pan. Let it cool completely.
- Crumble and mix – Crumble the cooled cake into a large bowl and mix with vanilla frosting until it forms a dough-like consistency.
- Shape the scoops – Scoop the mixture into 2-tablespoon portions and roll into balls. Place on a lined baking sheet and freeze for 30 minutes or until solid.
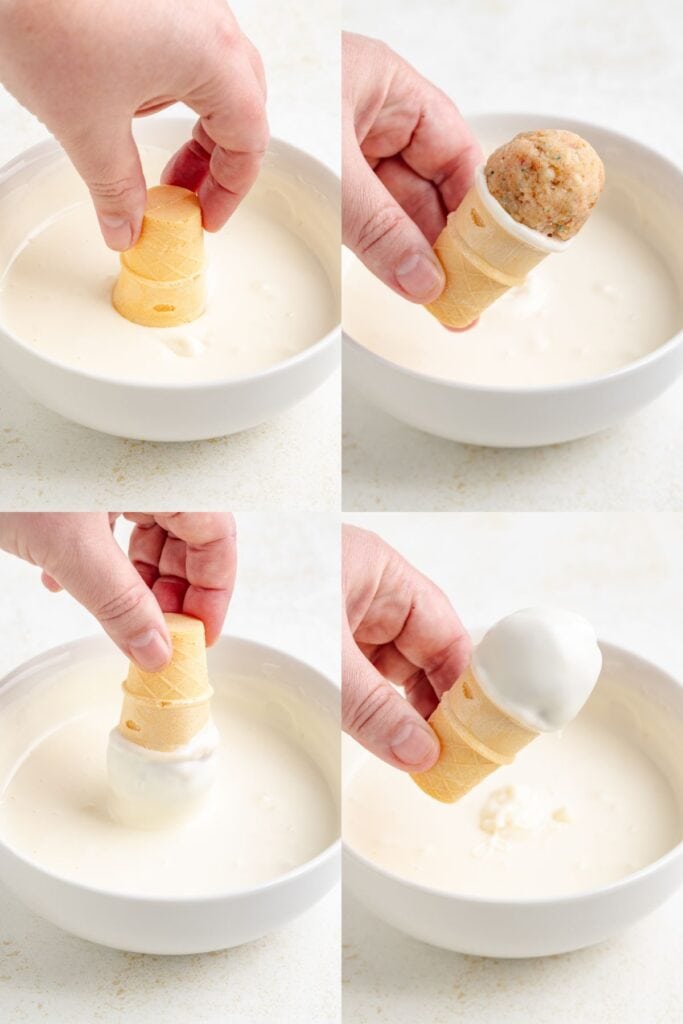
- Attach to cones – Working in small batches of 5–6, dip the large opening of a mini cone into melted candy melts, then press a frozen cake ball firmly on top to attach. Keep remaining cake balls in the freezer until ready to use.
- Coat the cake balls – Dip each cake ball (now attached to a cone) into melted vanilla almond bark to coat. Let the excess drip off and place upright to set.
- Decorate – Once the coating is set, drizzle with melted chocolate or pink wafers to mimic fudge or strawberry sauce. Top with rainbow sprinkles and a large round red or pink sprinkle as the cherry.
- Let set – Allow the decorations to harden at room temperature or refrigerate briefly until firm.

Variations and Substitutions
- Different cake flavors – Swap Funfetti for chocolate, red velvet, or strawberry cake mix to match your party theme or taste preference.
- Alternative frosting – Try cream cheese, chocolate, or flavored frosting instead of vanilla for a different filling flavor.
- Color-themed coatings – Use candy melts in different colors to coordinate with holidays, birthdays, or baby showers. I like making red, white, and blue ones for the 4th of July.
- DIY “cherries” – If you don’t have large sprinkles, use red Sixlets, M&M’s, or even small gumballs as the cherry topper.
Tips for Success
- Work in batches – Only take out a few cake balls at a time to keep them cold and firm during assembly. The frozen cake balls will stick instantly to the melted candy on the cone, setting quickly and helping them stay secure when flipped upside down for dipping. If the cake balls are too warm, they may loosen and slide off into the melted almond bark when dipped. Keeping them frozen is key for clean assembly and coating.
- Use a cookie scoop – A 2-tablespoon scoop helps keep all your cake balls the same size, making assembly and coating easier.
- Freeze thoroughly – Make sure the cake balls are solid before attaching or dipping to prevent them from falling off.
Want to be the first to know when the next recipe is published? Sign up for our newsletter updates below.
Looking for more cute desserts?
Check out these fun recipes
Did you love these ice cream cake pops? Please leave a star rating and share your thoughts in the comments below.

Ice Cream Cake Pops Recipe
Ingredients
- 1 box Funfetti cake mix
- ingredients listed on cake mix box usually eggs, oil, and water
- 1/2 cup vanilla frosting
- 35 mini cup cones
- 12 ounces vanilla almond bark
- 1/3 cup chocolate melting wafers
- 1/3 cup pink melting wafers
- 35 large round red or pink sprinkles
- rainbow sprinkles for decorating
Instructions
- Preheat the oven and bake the cake as directed on the box. Let it cool completely.
- Crumble the cooled cake into a large bowl and mix with vanilla frosting until it forms a dough-like consistency.
- Scoop into 2-tablespoon portions, roll into balls, and freeze for 30 minutes or until solid.
- Working in batches of 5–6, dip the opening of each cone into melted candy melts and press a frozen cake ball firmly on top. Keep remaining cake balls in the freezer until ready to use.
- Dip each attached cake ball into melted vanilla almond bark, let the excess drip off, and place upright to set.
- Drizzle with melted chocolate or pink wafers, then top with rainbow sprinkles and a round red or pink sprinkle.
- Let the decorations harden completely at room temperature or refrigerate briefly until firm.
Notes
- Store the finished cake pops upright in a cool, dry place for up to 2 days. Keep them out of direct sunlight or heat to prevent the coating from melting.
- For longer storage, place them in an airtight container in the fridge for up to 5 days. Bring to room temperature before serving for the best texture.
- You can freeze the undecorated cake balls (without cones or coating) for up to 1 month. Thaw in the fridge before assembling and dipping.
Nutrition
Disclaimer: Nutrition information is estimated based on automated calculations and should be considered as an approximation. These estimates are provided as a courtesy. Please use your own brand’s nutritional values to verify accuracy.
Are there any substitutions for the almond bark? Can I use icing instead? Not a fan of chocolate.
The vanilla almond bark is there to give the cake pops their “ice cream” look and create a firm outer coating. I wouldn’t recommend using icing because it won’t harden the same way and can become sticky or messy to handle.
Instead, you can substitute white candy melts, white melting wafers, or another flavored candy coating that hardens after dipping. If you’re not a fan of chocolate flavors, most vanilla candy melts have a mild vanilla flavor that’s very similar to almond bark without tasting like chocolate.