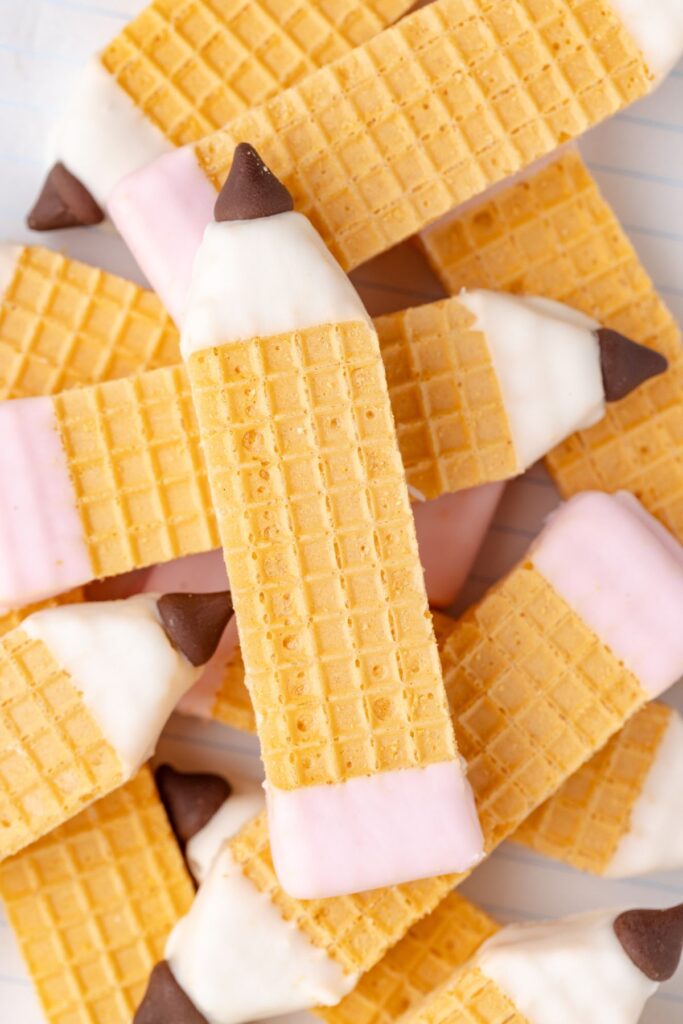
Easy Pencil Cookies

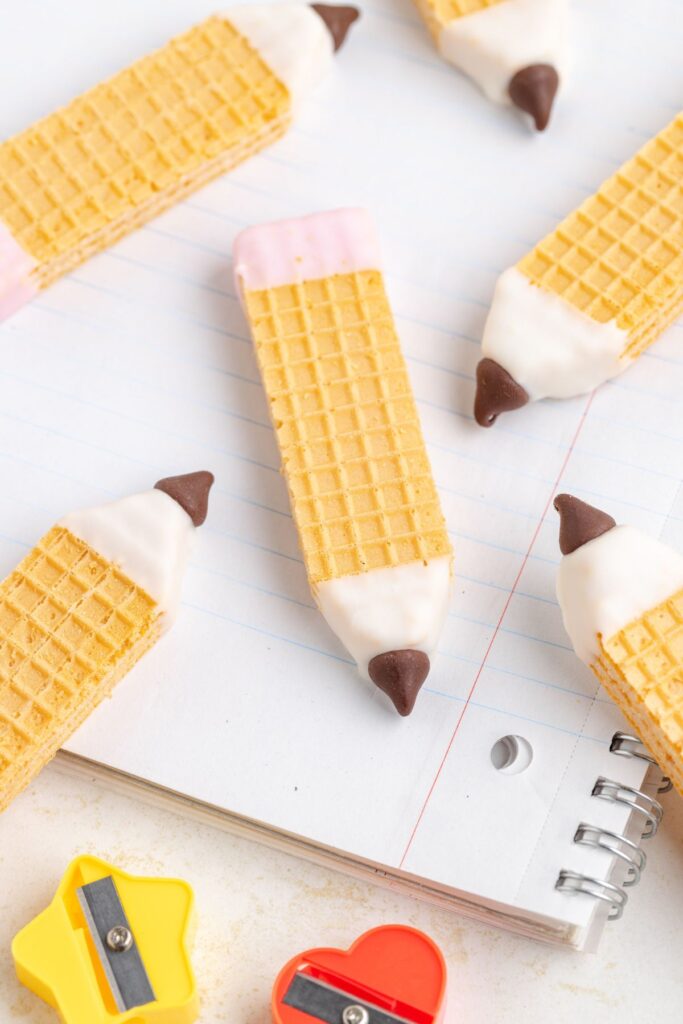
These pencil cookies are a fun treat made with just three ingredients: wafer cookies, candy melts, and chocolate chips. Perfect for an easy back-to-school snack, they come together quickly and are sure to put a smile on everyone’s face.
Easy Pencil Wafer Cookies
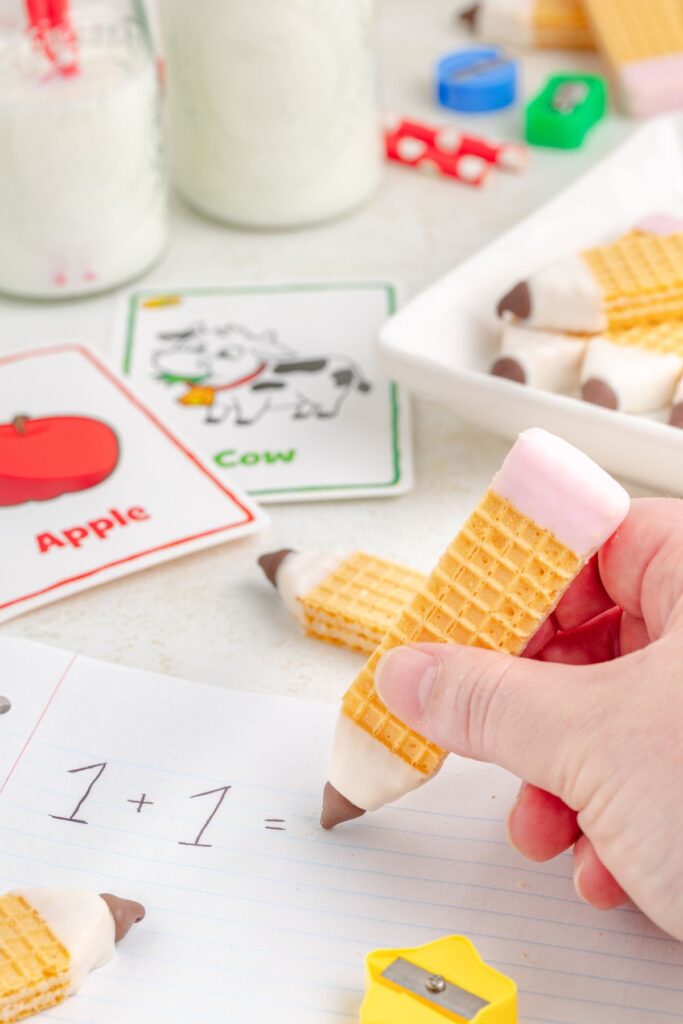
I love how these pencil cookies are no-bake, which means no need to turn on the oven and heat up the kitchen. Plus, the kids can help with every step, making it a fun family activity to prepare for the first day of school. The wafer cookies provide the perfect crunch, and with just a bit of candy melts and chocolate chips, you have an adorable treat that’s almost too cute to eat.
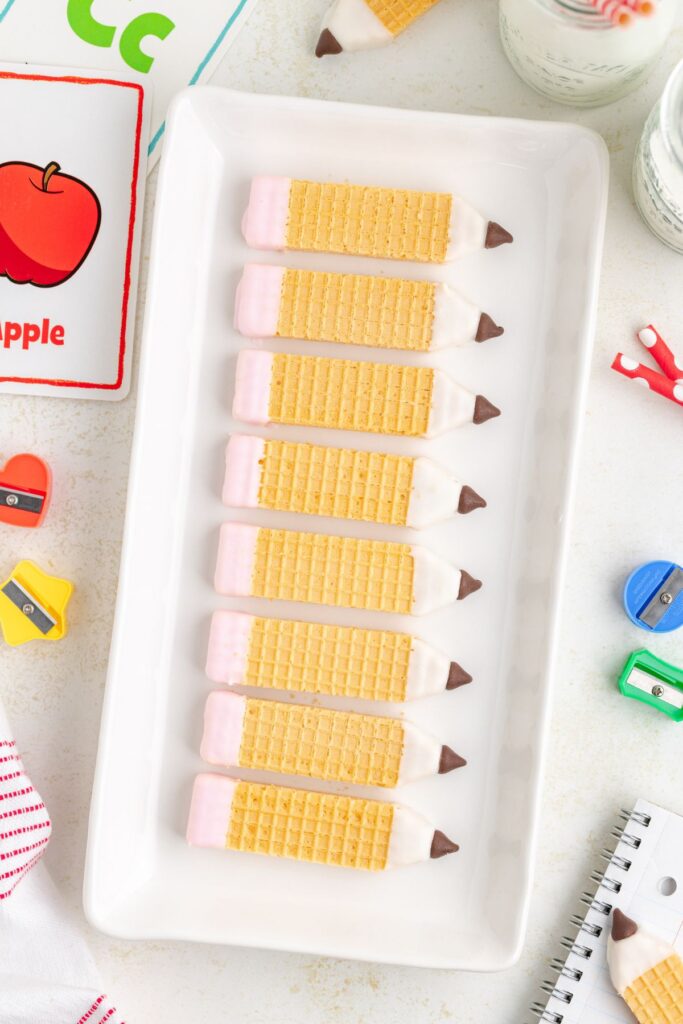
To make these, all you need to do is dip the wafer cookies into the melted candy, add the chocolate chip “tips,” and then let them set. It’s super simple and doesn’t take much time at all. These pencil cookies are perfect for packing in lunchboxes or serving at a school-themed party. Trust me, they’re always a hit!
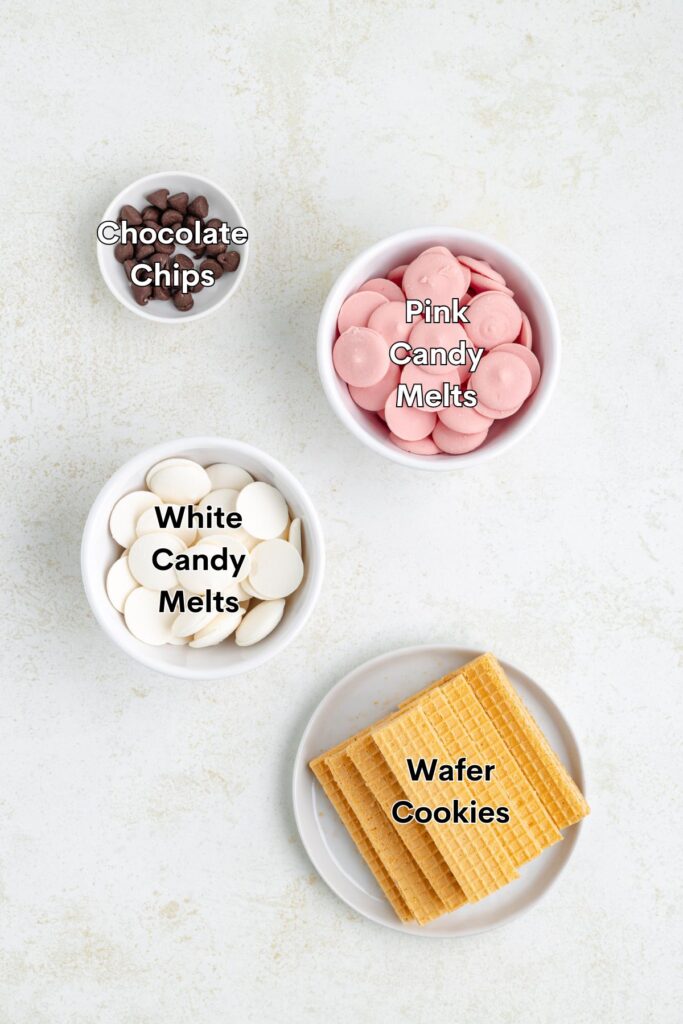
Simple Ingredients
- Wafer cookies: These provide a crunchy base that mimics the shape of a pencil.
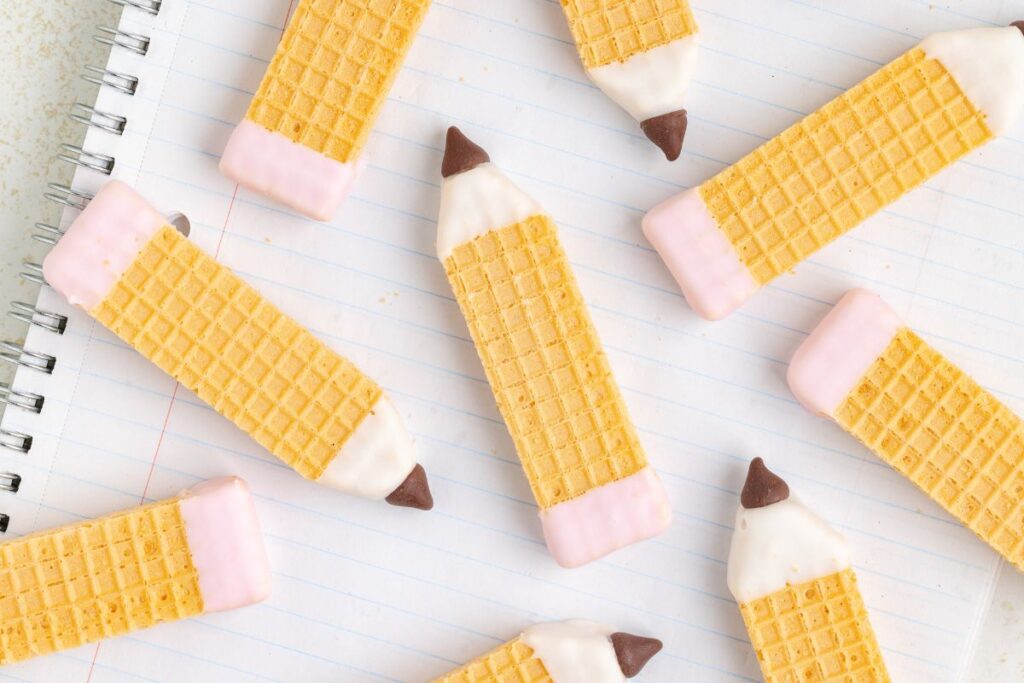
- Pink Candy Melts: Used to create the “eraser” end of the pencil.
- White Candy Melts: Coats the opposite end of the wafer cookie to resemble the sharpened pencil point.
- Chocolate Chips: To make the pencil ‘tip’.
Making the Pencils
- Prepare: Line a baking sheet with a piece of parchment paper.
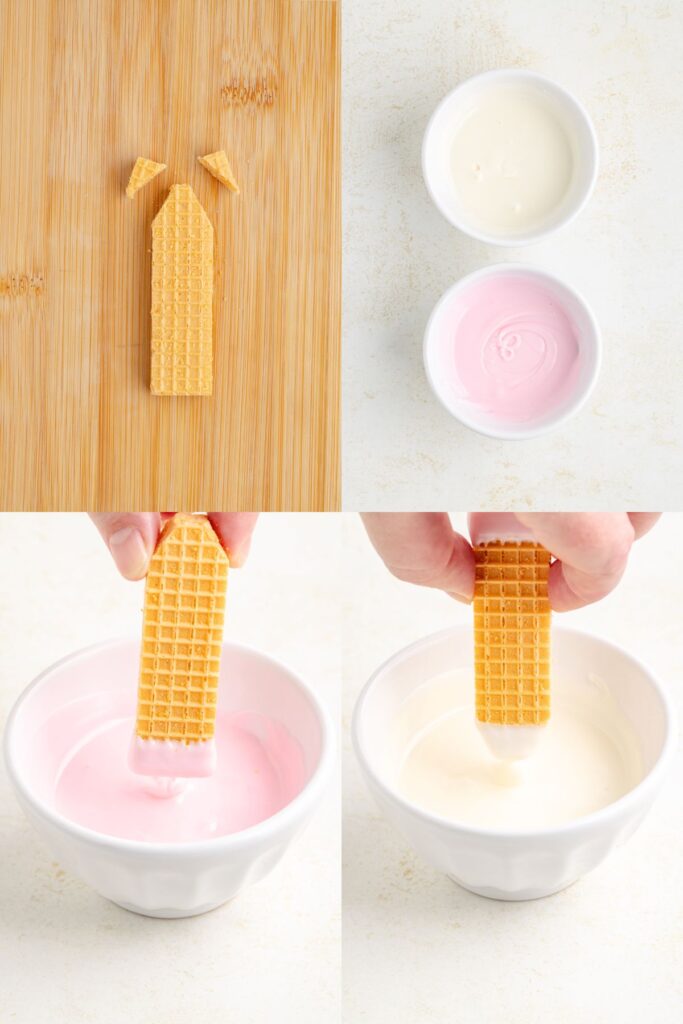
- Shape the pencil: Cut one end of each wafer cookie into a point by making two 45-degree cuts.
- Prepare the candy melts: Melt the pink and white candy melts in separate bowls according to the package instructions.
- Dip the eraser part: Dip the flat end of the wafer cookies into the pink chocolate to create the eraser.
- Coat the sharpened end: Carefully dip the pointed end of each wafer cookie into the white melting chocolate, being care not to touch the pink end with your hand.
- Add the pencil tip: Immediately attach a chocolate chip to the tip of the white end while it is still wet so it sticks properly.
- Let them set: Place the cookies on the prepared baking sheet and allow them to fully set before serving. You can speed up the process by placing them in the fridge for a few minutes.
Variations and substitutions
Wafer cookies: Use different-colored wafer cookies to create different-colored pencils. If you can’t find wafer cookies, try using pretzel rods for the pencil body.
Chocolate Chips: Use any ‘chip’ you have. White chocolate, peanut butter, or butterscotch are all fun alternatives for a different-colored pencil lead. You can also use mini chocolate chips or the colorful candy-coated mini chocolate chips they use for cosmic brownies; your pencil tip will just be a bit smaller.
Decorations: Add sprinkles or edible glitter to the candy melts before they set for extra fun and texture.
Flavors: To give the cookies a unique taste, add a drop of oil-based extract (like mint or orange) to the candy melts. Just be sure to use an oil-based extract, or the candy melts will seize!
Tips for success
- Use the cookie lines as a guide: The lines on the wafer cookies can guide where to cut and how far to dip the ends into the candy melts for uniform-looking cookies.
- Leave a flat part at the pointed end: To make it easier for the chocolate chip to attach, leave a small flat part at the pointed end of the cookie. See the photos below the instructions for reference.
- Tap off excess candy melts: After dipping the wafer cookies, gently shake or tap them on the side of the bowl to remove any excess candy melts. This helps create a smooth, even coating.
- Attach the tip while wet: Add the chocolate chip tip immediately after dipping the pointed end into the white candy melts to ensure it sticks properly.
- Reheat candy melts if needed: If the candy melts firm up before you’re finished, reheat them in the microwave in 10-second intervals until smooth and workable again.
- Scale the recipe: This recipe is easily scalable. Adjust the quantity of ingredients to make as few or as many pencil cookies as you need.
How to Store the Cookies
Store the cookies in an airtight container at room temperature for up to a week.
Want to be the first to know when the next great recipe is published? Sign up for our newsletter updates below.
Looking for more cute no-bake treats?
Check out these fun recipes.
Did you love these cute pencil cookies? Let me know what you think in the comments below.

Easy Pencil Cookies
Ingredients
- 20 wafer cookies
- 1/2 cup pink candy melts
- 1/2 cup white candy melts
- 20 chocolate Chips
Instructions
- Line a baking sheet with parchment paper.
- Cut one end of each wafer cookie into a point by making two 45-degree cuts.
- Melt the pink and white candy melts in separate bowls according to the package instructions.
- Dip the flat end of a wafer cookie into the pink candy melts to create the eraser.
- Carefully dip the pointed end of the cookie into the white candy melts, ensuring not to touch the pink end.
- Immediately attach a chocolate chip to the tip of the white end while it is still wet, so it sticks properly.
- Place on the prepared baking sheet and repeat with the remaining cookies.
- Allow all the dipped and decorated cookies to fully set before serving.
Notes
- Store the cookies in an airtight container at room temperature for up to a week.
Nutrition
Disclaimer: Nutrition information is estimated based on automated calculations and should be considered as an approximation. These estimates are provided as a courtesy. Please use your own brand’s nutritional values to verify accuracy.
These are so cute! I made a few today for a trial run. Is there anything you do to get the chocolate smooth on the side that is on the parchment after dipping? I am trying to think of a way to get them to look as cute on the back as on the front!
Thank you! Such a fun idea!
You could dip one end and then stand the cookies upright either in a bowl of rice, or just balance them against something with the dip end not touching anything until they dry, then dip the other end and leave that end exposed to dry.