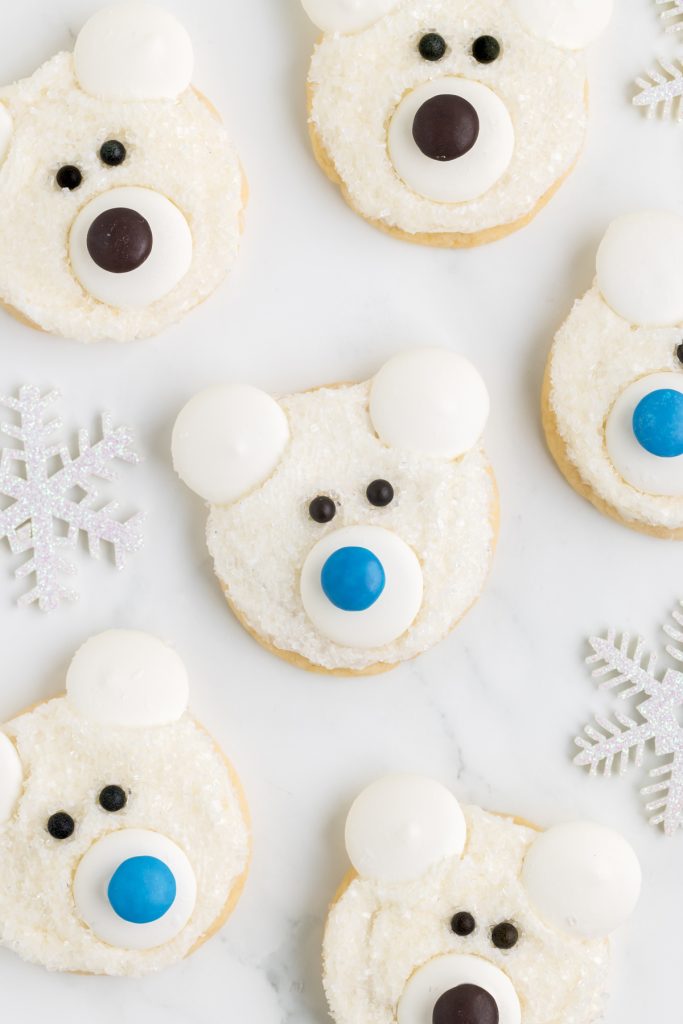
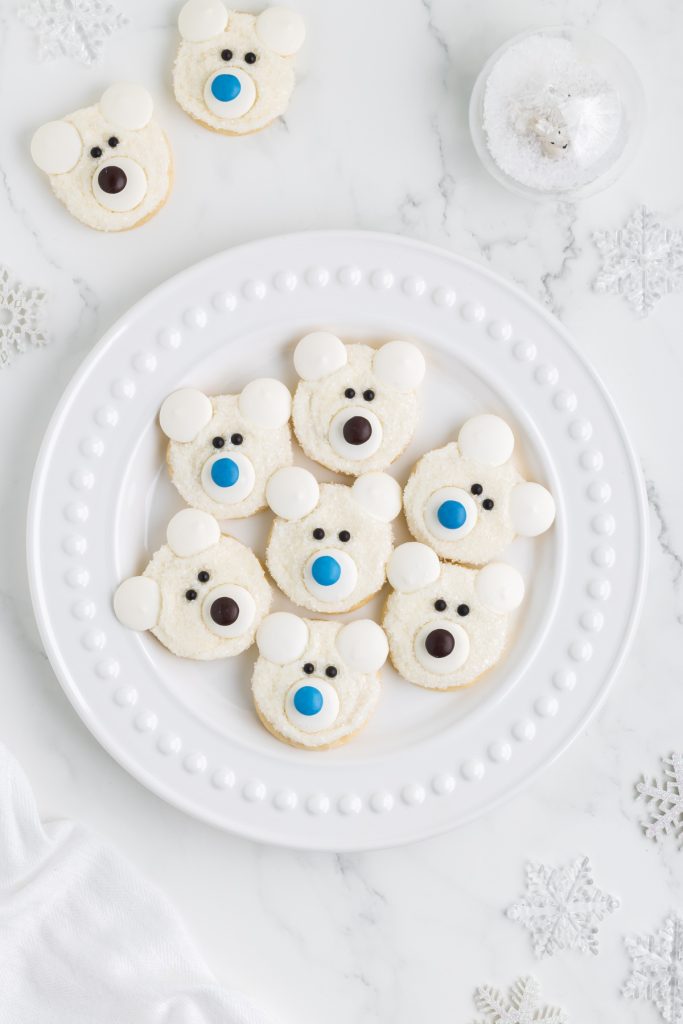
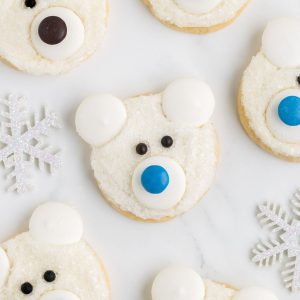
Polar Bear Face Cookies


These Polar Bear Cookies start with a box of white cake mix and bake up into soft, chewy cookies with creamy frosting. Designed to look like adorable polar bear faces, they’re a fun and festive treat perfect for Christmas cookie trays or winter parties.
Easy Polar Bear Face Cookies
Cake mix cookies are one of my favorite semi-homemade baking hacks. They’re quick, reliable, and have that perfectly soft, chewy texture, and adding frosting to them just takes them to the next level. These cake mix polar bear cookies are such a cute example of how easy it is to dress up a simple cookie for the holidays.
I always look forward to baking fun, festive cookies like these with my niece and nephew. We’ve made Polar Bear Paw Print Cookies, Snowman Face Cookies, and Chocolate Reindeer Cookies together over the years, and this recipe fits right into our holiday tradition. The cake mix base makes it simple enough for little hands to help with, and watching them carefully decorate each cookie face is honestly the best part.
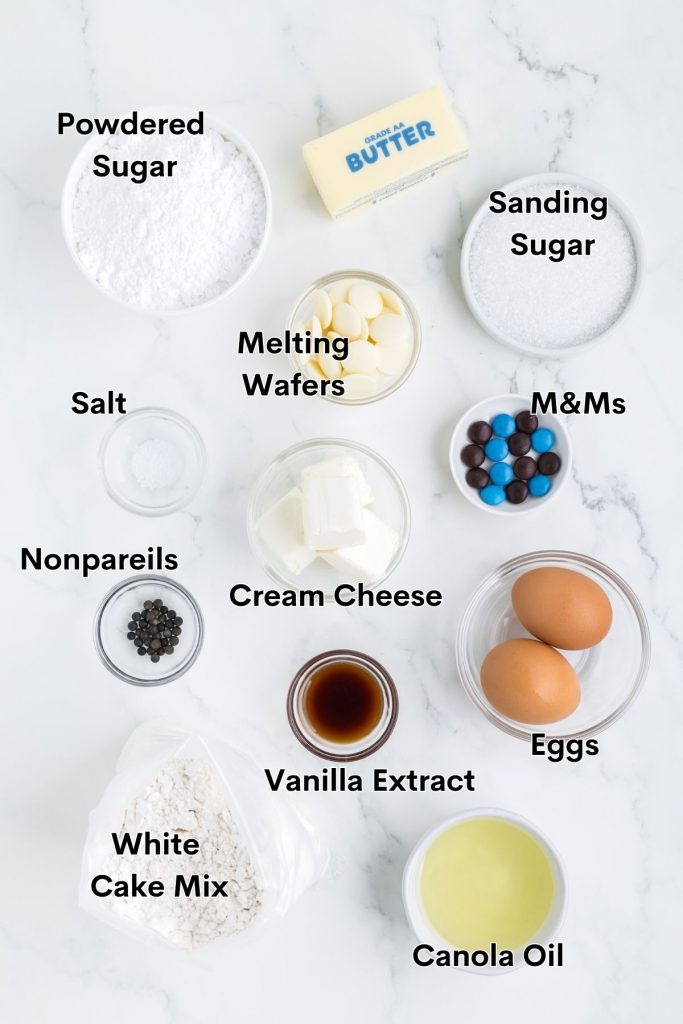
Ingredients
- White cake mix – Forms the base of the cookie dough.
- Vegetable or canola oil – Adds moisture and helps bind the dough.
- Eggs – Provide structure and help the cookies rise.
- Vanilla extract – Adds flavor to the cookies and frosting.
- Unsalted butter – Forms the base of the frosting.
- Cream cheese – Adds creaminess and slight tang to the frosting.
- Powdered sugar – Sweetens and thickens the frosting.
- Salt – Balances the sweetness.
- White sanding sugar – Creates a sparkly, snowy finish.
- White melting wafers – Used to form the ears and snout of the polar bear face.
- Black nonpareils – Used for the eyes and nose.
- Blue or brown M&Ms – Used for the polar bear’s nose center.
Making the Cute Christmas Cookies
- Prep – Preheat your oven to 350 degrees F. Line baking sheets with parchment paper.
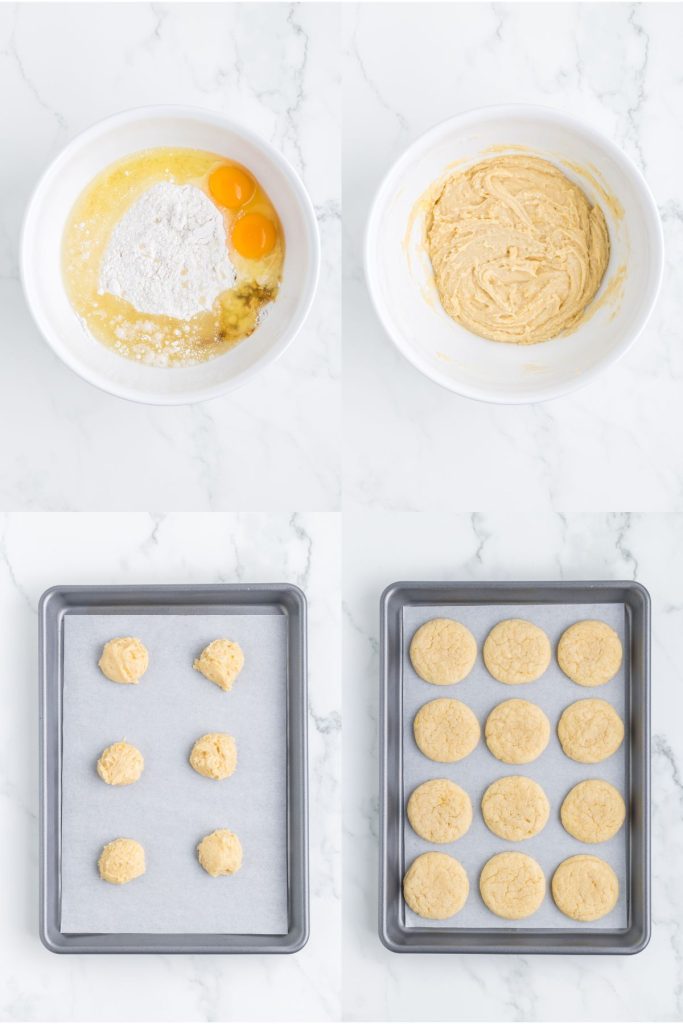
- Mix the dough – In a large bowl, combine the cake mix, vegetable oil, eggs, and vanilla extract. Stir until a soft dough forms.
- Scoop and bake – Scoop tablespoon-sized balls of dough and place them 2 inches apart on the prepared baking sheets. Bake for 9–11 minutes, or until the edges are set. Let the cookies cool completely.
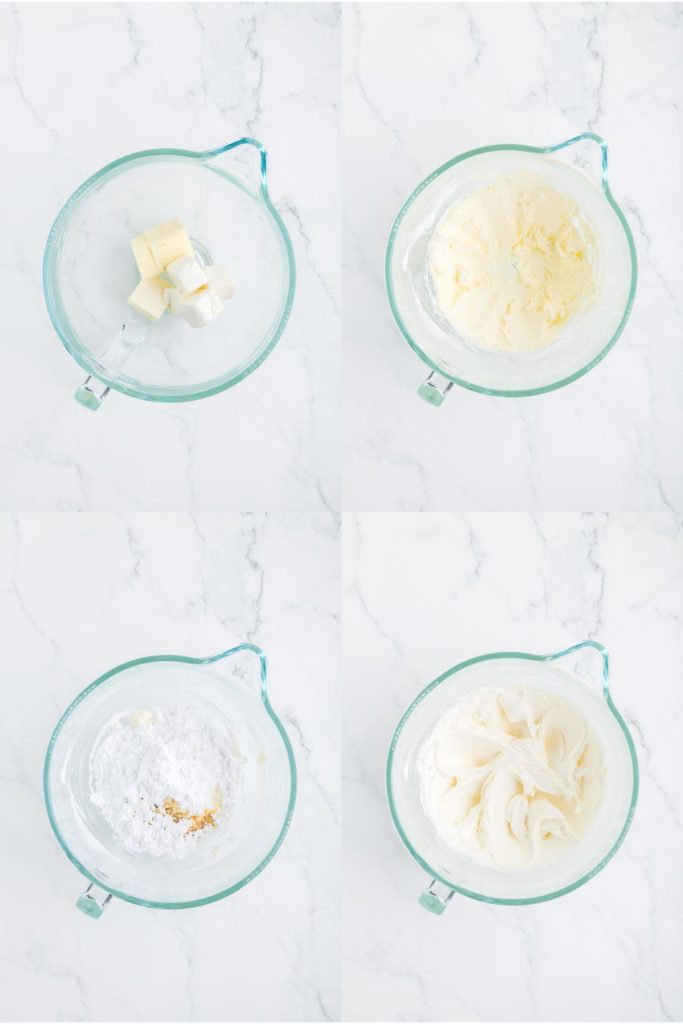
- Make the frosting – In a medium bowl, beat the butter and cream cheese until smooth. Add powdered sugar, vanilla extract, and a pinch of salt. Beat until fluffy.
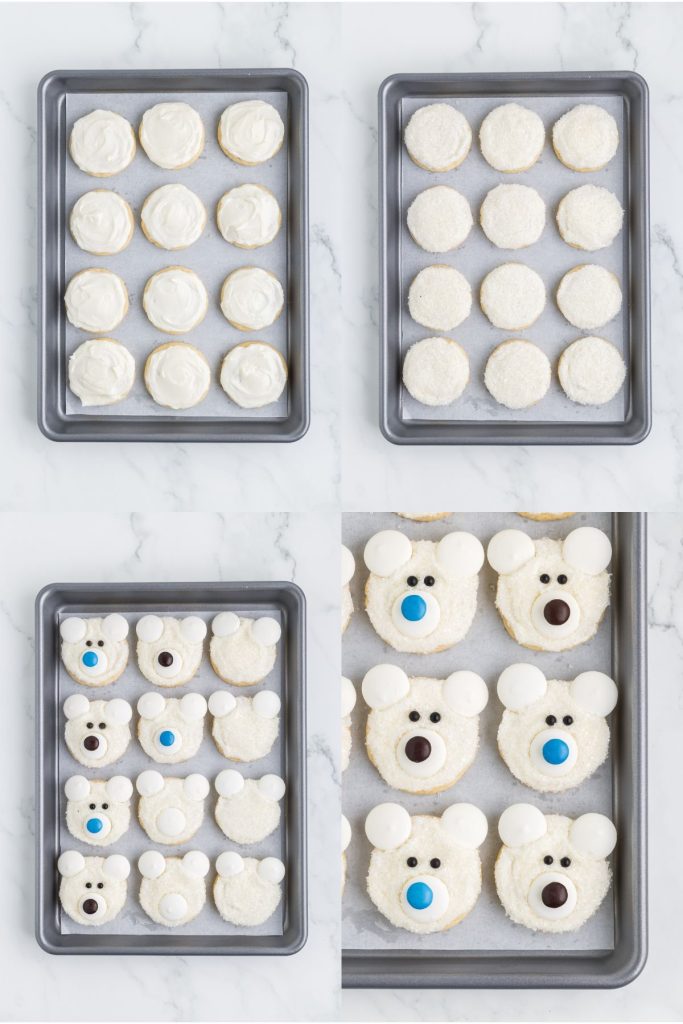
- Frost the cookies – Spread a thin layer of frosting on each cooled cookie.
- Add sanding sugar – Dip each frosted cookie into white sanding sugar to coat the top.
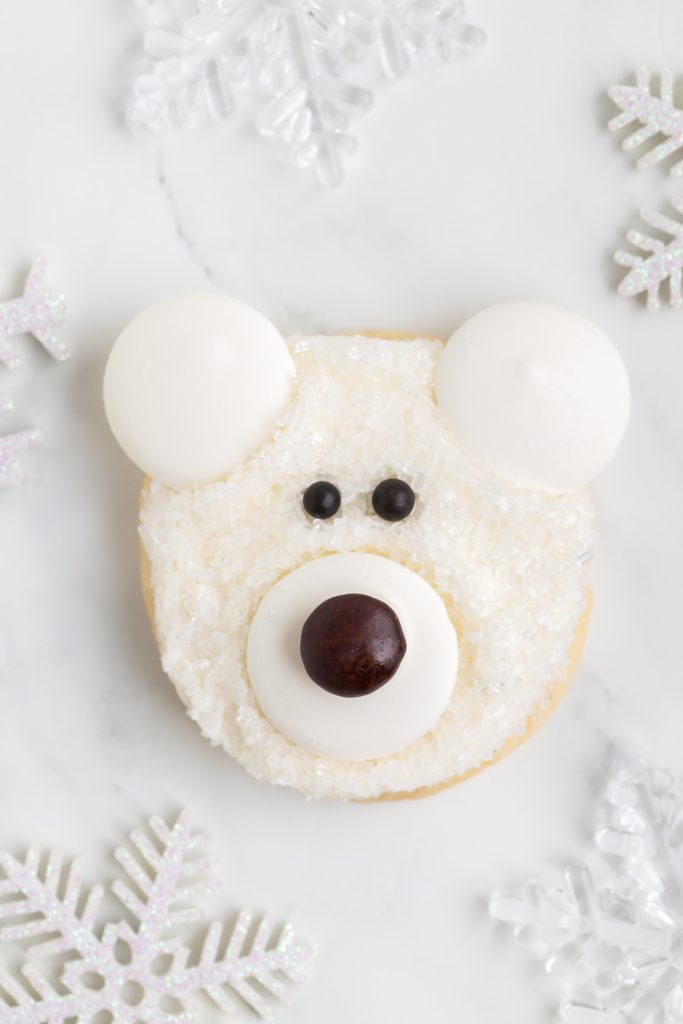
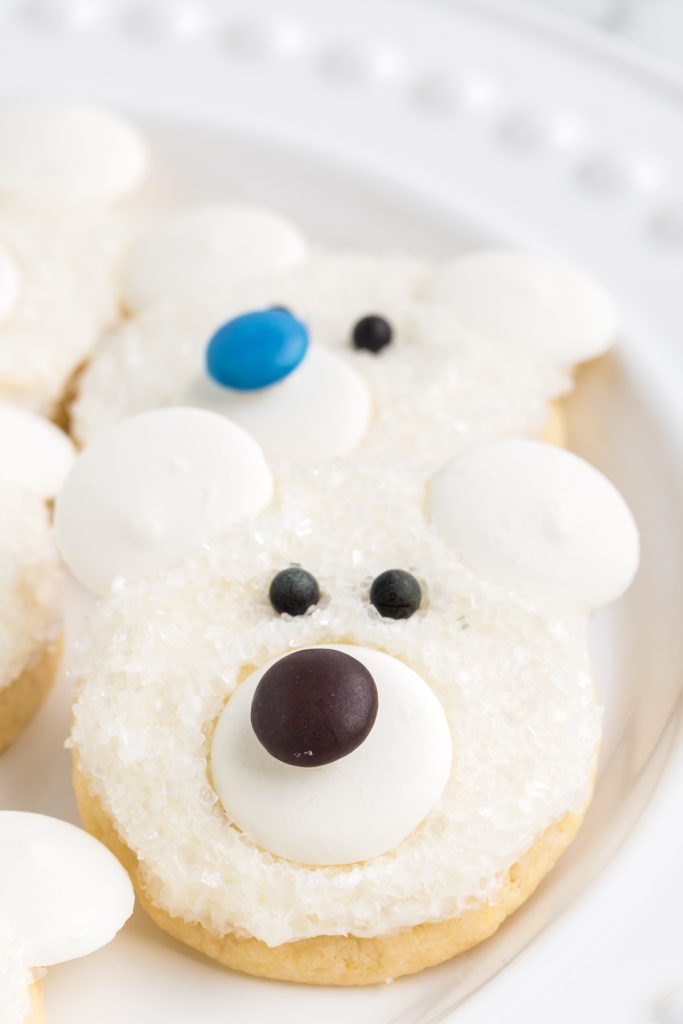
- Decorate the faces – Place one white melting wafer in the center bottom of each cookie for the snout, and two at the top for ears. Use a dab of frosting to attach an M&M to the snout and two black nonpareils above for eyes.
Variations and substitutions
- Vanilla cake mix – Use vanilla cake mix instead of the white cake mix. I used white cake mix in this recipe as it seems to be easier to find at most grocery stores in my area than vanilla. However, if you can find the vanilla cake mix, feel free to use it to omit the vanilla from the cookies. We’re all about easy around here and that will save you a step!
- Brown bear cookies – Instead of polar bears, you can make brown bear face cookies. Use chocolate cake mix instead of white for the cookie base. Make a chocolate frosting by adding 2 tablespoons of cocoa powder and decorate with chocolate jimmies and chocolate melting wafers.
- Coconut fur – Can’t find white sanding sugar? No problem! Just use sweetened shredded coconut for the fur instead.
- Vanilla frosting – Not a fan of cream cheese? Replace it with an additional 4 tablespoons of butter and 1/2 teaspoon more vanilla to make vanilla frosting instead.
- Store-bought frosting – Use canned cream cheese or vanilla frosting if you’re short on time.
- Nose alternatives – Use chocolate chips, brown M&Ms, or mini peanut butter cups in place of blue M&Ms.
- Eye substitutes – Swap black nonpareils with mini chocolate chips or edible black gel.
Tips for success
- Do not overbake your cookies – The cookies are baked when the edges are ever so lightly golden, and the tops of the cookies no longer look doughy. If the edges of your cookies have turned brown, you have baked them for too long.
- Keep the cookies small – Use a 1 tablespoon scoop or measuring spoon when forming the dough balls. You don’t want to make the cookies too large, or the face proportions will be off.
- Use a large-sized melting wafer – I recommend using a larger melting wafer such as Sweetshop Melt’Ems or Wilton Brand. I tried decorating the cookies using Ghirardelli white melting wafers however, I felt they were too small for the ears and muzzle.
- Full-fat ingredients – Use full-fat brick-style cream cheese for the frosting. The whipped cream cheese that comes in tubs contains too much water and will cause the frosting to weep.
- Avoid creepy eyes – Some brands of nonpareils may bleed when stored in the refrigerator. If you are not planning to serve your cookies right away, consider waiting to add the nonpareil eyes to avoid any color bleed.
Want to be the first to know when the next brownie recipe is published? Sign up for our newsletter updates below.
More frosted cake mix cookie recipes to try
Looking for more frosted cookies made with cake mix? These are simple and fun to bake.
Did you love these polar bear Christmas cookies? Please leave a star rating and share your thoughts in the comments below.
Cake Mix Polar Bear Cookies
Ingredients
Cookies
- 1 (15.25 ounce) box of white cake mix
- 1/3 cup vegetable oil
- 2 large eggs
- 1 teaspoon vanilla extract
Frosting
- ½ cup unsalted butter room temperature (1 stick)
- 4 ounces cream cheese room temperature (½ a block)
- 1 ½ cups powdered sugar
- ½ teaspoon vanilla extract
- pinch salt
Decorations
- ½ cup white sanding sugar
- 84 round white melting wafers
- 56 black nonpareils
- 28 blue or brown M&Ms
Instructions
Cookies
- Preheat the oven to 350 degrees. Line three large cookie sheets with parchment paper and set aside.
- Combine the cake mix, oil, eggs, and vanilla in a large bowl until smooth and no streaks of flour remain.
- Scoop 1 tablespoon balls of dough onto the parchment-lined cookie sheets, leaving at least 1 ½ inches between each ball.
- Bake for 7-9 minutes or until the edges of the cookies are set. Allow the cookies to cool on the cookie sheet before transferring to a wire rack to finish cooling.
Frosting
- Beat the butter and cream cheese with a hand or stand mixer in a large bowl until light and fluffy.
- Scrape the sides of the bowl and beat in the powdered sugar, vanilla, and salt until smooth and fluffy.
Assembly
- Place the sanding sugar on a small plate and set aside
- Frost the cooled cookies with a generous layer of frosting.
- Gently press the cookie into the sanding sugar to coat the frosting and create the fur.
- Gently press two melting wafers into the top of the cookie to create the ears.
- Press one melting wafer into the lower third of the cookie to create the muzzle.
- Apply a small amount of frosting to one side of an M&M and attach it to the muzzle melting wafer to create the nose.
- Place two nonpareils above the muzzle to create the eyes.
- Allow the frosting to set for 20-30 minutes before serving.
Notes
- Store leftovers in an airtight container in the refrigerator for up to five days. Wait for the frosting to harden before stacking the cookies. Because the frosting contains cream cheese, the cookies should be refrigerated.
- Some brands of nonpareils may bleed when stored in the refrigerator. If you are not planning to serve your cookies right away, consider waiting to add the nonpareil eyes to avoid any color bleed.
Nutrition
Disclaimer: Nutrition information is estimated based on automated calculations and should be considered as an approximation. These estimates are provided as a courtesy. Please use your own brand’s nutritional values to verify accuracy.
The polar bear face cookies are truly enticing. Looks delish as well. It is a fun cookie to try and I feel like kids would love this.
These polar bear cookies are adorable and look simple enough to make. A delicious addition to add to our holiday dessert table with the polar bear footprint cookies!
They are SO adorable….will do them with my niece next time she comes and visits. Thanks so much for sharing 😉
These are so cute. I want to save these to make with our toddler for the holidays!
These are so stinkin cute!! My grandkids are going to love making these with me!
Oh my… they are spectacular. Each polar bear face is adorable and loved the ease of making this cookies..
So cute- and you really don’t have to be crafty! Kids loved making and eating!
So perfect for the holiday season!
how stinking cute are these polar bears! I made these for my kids’ bake sale and they were such a hit!
Glad to hear they were a hit!