

Peppermint Bark Brownies


This post may contain affiliate links. Please read our full disclosure policy.
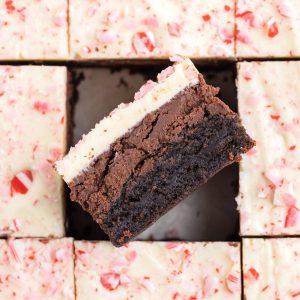
These Peppermint Bark Brownies start with a simple box mix and finish with a festive chocolate-peppermint topping. They’re easy to make and perfect for sharing during the holidays.
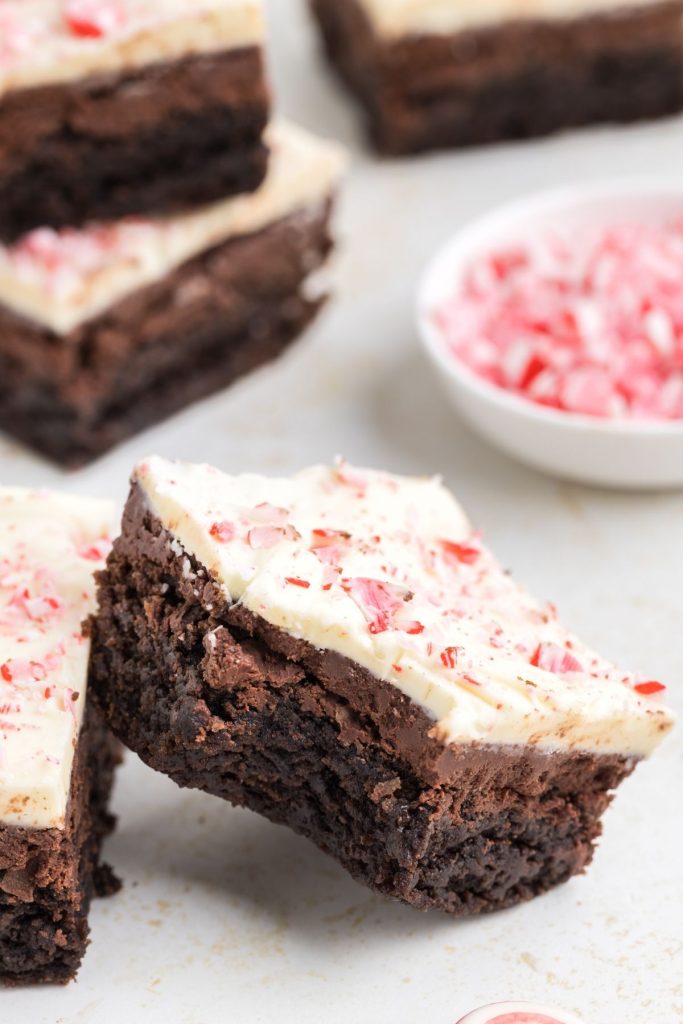
Easy Brownies with Peppermint Bark
I’ve always loved peppermint bark. It’s the one holiday candy I look forward to every year. And since I already love dressing up boxed brownie mixes, turning peppermint bark into a brownie topping just made sense.
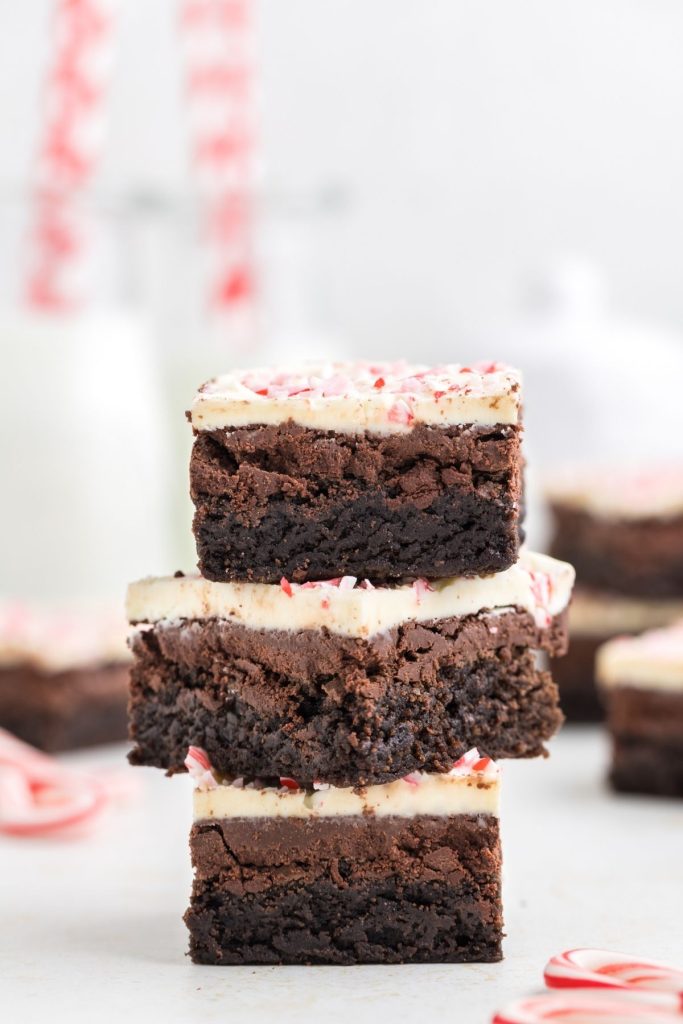
I’ve done something similar with my Baileys Brownies and Buckeye Brownies, but for these, I wanted to add a layer of chocolate gancahe underneath the white chocolate and crushed candy canes. It gives the brownies an extra layer of chocolate while keeping those classic peppermint bark flavors on top.
If you love peppermint bark and brownies like I do, check out my Peppermint Bark Brownie Cookies. They’ve got all the same flavors as these brownies, just in cookie form!

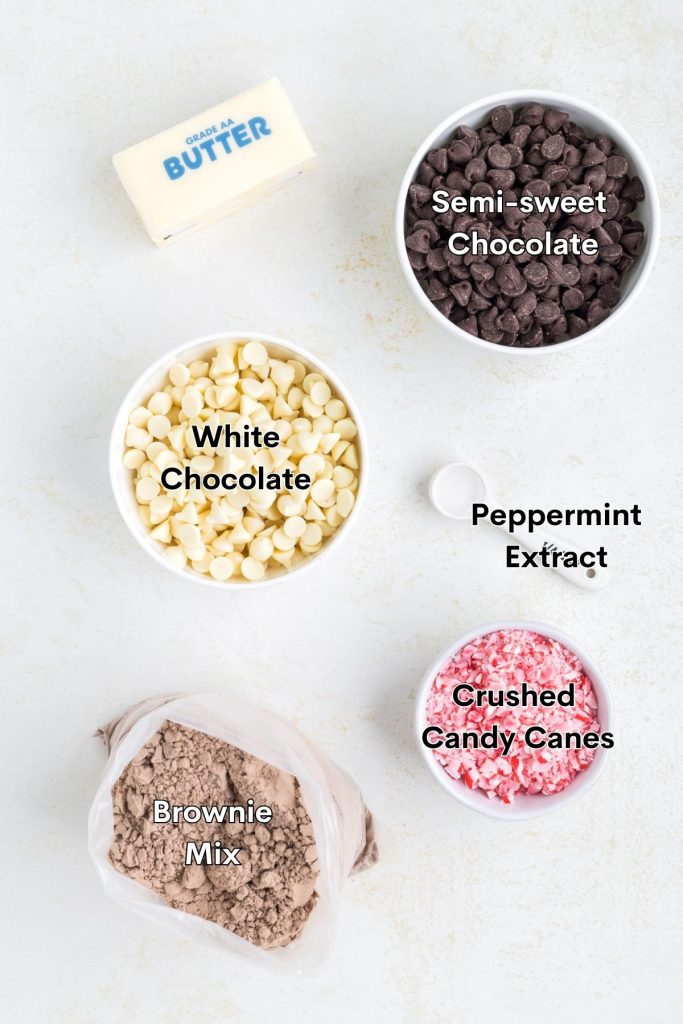
Ingredients
- Boxed brownie mix – Use your favorite. I used Duncan Hines Dark Chocolate Fudge.
- Ingredients to make the brownies – These will be listed on the back of the box. Mine called for 1 egg and 1/3 cup each of water and oil.
- Peppermint extract – Optional to add another layer of peppermint flavor to the brownies.
- Semi-sweet chocolate – Forms the chocolate layer between the brownies and the peppermint bark topping.
- Unsalted butter – Melted with the semi-sweet chocolate to give the chocolate layer a softer texture.
- White chocolate – Creates the top layer of the peppermint bark topping.
- Crushed candy canes – Add peppermint flavor and a little crunch to the topping.
How to Make Peppermint Bark Brownies
- Prep – Preheat the oven according to your brownie mix instructions and line a 9×9-inch pan with parchment paper, making sure it covers the bottom and sides.
- Make the brownie base – Mix the brownie batter according to the package directions. Stir in the peppermint extract if using, then bake as directed. Let the brownies cool completely in the pan before adding the chocolate layers.
- Make the chocolate layer – Combine the semi-sweet chocolate chips and butter in a microwave-safe bowl. Microwave in 20-second intervals, stirring between each, until melted and smooth. Spread evenly over the cooled brownies.
- Chill briefly – Refrigerate the brownies for 10 minutes to let the chocolate layer firm up slightly. Do not leave them in the refrigerator for longer than 15 minutes, or the chocolate will become too hard.

- Melt the white chocolate – In a separate microwave-safe bowl, melt the white chocolate chips in 15- to 20-second intervals, stirring frequently. Let the melted chocolate cool slightly so it doesn’t melt the layer underneath, but don’t let it cool so much that it becomes difficult to spread.
- Add the white chocolate – Gently spread the melted white chocolate over the semi-sweet chocolate layer, being careful not to disturb the chocolate underneath.
- Add the candy canes – While the white chocolate is still soft, sprinkle the crushed candy canes evenly over the top and gently press them in so they stick.
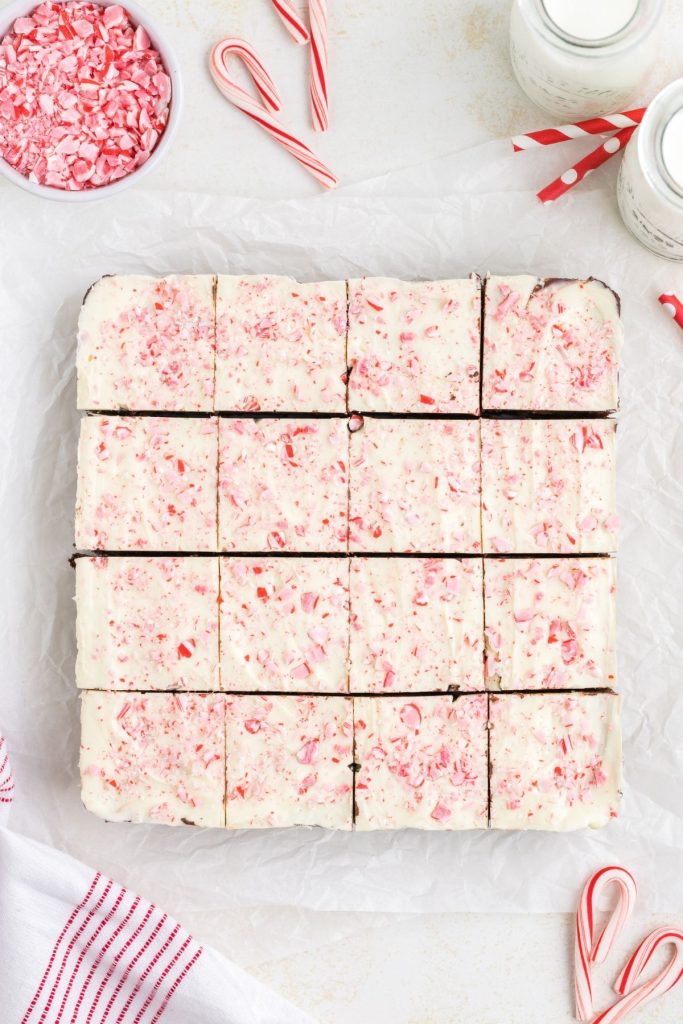
- Set and score – Let the brownies sit at room temperature until the white chocolate is partially set but still soft enough to score. Use a sharp knife to mark where you’ll cut the brownies. Allow the topping to finish setting at room temperature before slicing along the scored lines. Do not refrigerate the brownies after adding the white chocolate. The topping will become too hard to cut.

Variations and Substitutions
- Homemade brownies – You can use your favorite homemade brownie recipe instead of a boxed mix. Just be sure to use a recipe that fits a 9×9-inch pan.
- Change the pan size – An 8×8-inch pan will give you thicker brownies, while a 9×13-inch pan will give you thinner brownies. Check your brownie mix package for the recommended pan sizes and adjust the baking time accordingly.
- Change the chocolate – I prefer semi-sweet chocolate chips to balance the sweetness of the white chocolate topping, but bittersweet or milk chocolate chips can also be used. Keep in mind that milk chocolate will result in a sweeter topping.
- Skip the butter – You can use melted semi-sweet chocolate without the butter, but the chocolate layer will set much firmer and may crack when sliced. The butter helps keep the chocolate softer and allows it to adhere better to the brownie base.
Tips for Success
- Cool the brownies completely – Make sure the brownie base is completely cool before adding the chocolate layer. If the brownies are still warm, the chocolate may not set properly.
- Don’t overheat the chocolate – Melt the semi-sweet chocolate and butter in short intervals, stirring frequently. White chocolate is especially sensitive to overheating, so use shorter intervals and stir well between each.
- Keep the chilling time short – Refrigerate the brownies for 10 minutes after adding the semi-sweet chocolate layer, but no longer than 15 minutes. You want the chocolate to firm up slightly without becoming too hard.
- Let the white chocolate cool slightly – Allow the melted white chocolate to cool a little before spreading it over the chocolate layer. It should still be smooth and spreadable, but not so hot that it melts the chocolate underneath.
- Score before slicing – Once the white chocolate is partially set, use a sharp knife to gently score the surface where you plan to cut the brownies. This helps prevent the topping from cracking when you cut them into squares.
- Let the topping set at room temperature – Don’t refrigerate the brownies after adding the white chocolate. The chocolate topping will become too hard to slice cleanly. Let the layers finish setting at room temperature instead.
Want to be the first to know when the next easy brownie recipe is published? Sign up for our newsletter updates below.
Want more easy brownie recipes made with a box mix?
Looking for more ways to level up your brownies? These recipes are simple and delicious.
Did you love this easy holiday brownie recipe? Please leave a star rating and share your thoughts in the comments below.
Peppermint Bark Brownies Recipe
Ingredients
- 1 (18 ounce) box of brownie mix plus ingredients listed on the package
- ¼ teaspoon peppermint extract optional
- 2 cups semi-sweet chocolate chips
- 1/2 cup unsalted butter 1 stick
- 1 ½ cups white chocolate chips
- 3 candy canes crushed (about ¼ cup)
Instructions
- Preheat the oven to the temperature specified on the brownie mix package. Line the bottom and sides of a 9×9-inch baking pan with parchment paper, leaving an overhang to help remove the brownies.
- Mix the brownie batter according to the package directions, stirring in the peppermint extract if using.
- Spread the batter into the pan and bake according to the package instructions. Allow the brownies to cool completely in the pan before adding the chocolate layers.
- Combine the semi-sweet chocolate chips and butter in a microwave-safe bowl. Microwave in 20-second intervals, stirring between each, until melted and smooth.
- Spread the melted chocolate mixture evenly over the cooled brownies. Refrigerate for 10 minutes to let the chocolate firm up slightly, but no longer than 15 minutes. The layer should be set enough to support the white chocolate without becoming hard.
- Place the white chocolate chips in a separate microwave-safe bowl. Microwave in 15- to 20-second intervals, stirring frequently, until melted and smooth. Let the white chocolate cool slightly so it doesn't melt the chocolate layer underneath, but keep it soft enough to spread.
- Gently spread the white chocolate over the semi-sweet chocolate layer, being careful not to disturb the chocolate underneath.
- Immediately sprinkle the crushed candy canes evenly over the white chocolate. Press them gently into the surface to help them stick.
- Let the brownies sit at room temperature until the white chocolate is partially set but still soft enough to score. Use a sharp knife to lightly score the topping where you plan to cut the brownies.
- Allow the chocolate topping to finish setting completely at room temperature. Lift the brownies out of the pan using the parchment paper and slice along the scored lines. Do not refrigerate after adding the white chocolate, as the topping will become too hard to cut.
Notes
- Refrigerate the brownies for just 10 minutes after adding the semi-sweet chocolate and butter layer, but no longer than 15 minutes. You only want this layer to firm up enough to support the white chocolate topping.
- Once the white chocolate has been added, let the brownies finish setting completely at room temperature. Do not refrigerate them. Chilling causes the fats in the chocolate-butter layer to firm up, making the brownies difficult to bite through. It can also cause the chocolate layers to separate from the brownie base.
- Score the white chocolate while it’s partially set to help prevent cracking when slicing the finished brownies.
- Store brownies in an airtight container at room temperature for up to 3 days.
- Freezing is not recommended for the best topping texture. The chocolate layers become very firm when frozen, and condensation during thawing may affect the candy cane topping.
Nutrition
Disclaimer: Nutrition information is estimated based on automated calculations and should be considered as an approximation. These estimates are provided as a courtesy. Please use your own brand’s nutritional values to verify accuracy.

These peppermint bark brownies are everything I love in a dessert! A nice gooey brownie base works lovely with the texture and taste of the peppermint. The perfect treat to add to our holiday dessert table.
Oh my! These peppermint bark brownies are everything I love! I’m a huge fan of peppermint and chocolate – I can’t wait to make these!
Hi!
I can’t wait to try these I absolutely love the combination of chocolate 🍫 and peppermint together!
Hope you enjoy them!
The picture I had was of the brownies in the garbage. I followed the recipe exactly. I’m an experienced baker. Do not bake these brownies. The picture has to be AI.
1. When I cut the brownies the frosting combination fell off the top of the brownies. They were a mess. The chocolate frostings did not adhere to the brownies.
2. There were maybe 1 or 2 pieces that did not fall apart.
3. That was the biggest waste of money, when ingredients are very expensive.
4. When I’m writing the review a Samsung pop up kept appearing as if the website knew my review was negative.
I’m sorry to hear the brownies didn’t turn out well for you. I understand how frustrating it is to spend time and money on a recipe that doesn’t turn out as expected.
After receiving your comment, I went back and tested this recipe two more times to investigate the issues you described. Based on that additional testing, I’ve updated the instructions with more detailed guidance for handling the chocolate layers, particularly when it comes to refrigeration and cutting.
One important thing I found is that while the first chocolate layer needs a brief 10-minute chill, the brownies should not be refrigerated after adding the white chocolate. This causes the chocolate-butter layer to become too firm, making the brownies difficult to cut and potentially causing the topping to separate from the brownie base. I’ve also added instructions for scoring the white chocolate before it fully sets to help prevent cracking.
I also want to address your comment about the photographs. The images in this post are 100% real photographs of brownies I made myself, not AI-generated images. I’ve included a link below to an additional photo taken with my iPhone during my most recent round of recipe testing, showing the finished brownies and their distinct layers.
[https://semihomemadekitchen.com/wp-content/uploads/2026/11/Screenshot-2026-11-18-at-11.18.47-AM.png](https://semihomemadekitchen.com/wp-content/uploads/2026/11/Screenshot-2026-11-18-at-11.18.47-AM.png)
I also want to be clear that the Samsung pop-up you mentioned has nothing to do with whether a review is positive or negative. My website does not detect the sentiment of a review and display pop-ups based on what someone is writing.
I take the accuracy of my recipes seriously, and when someone reports a problem, I believe it’s important to investigate it rather than dismiss it. I’m sorry these didn’t work out for you, but I stand behind the recipe and the work I’ve put into testing it.
You know I left a negative review and deleted it. That’s awful.
I want to clarify that I did not delete your original review. All comments on my website are held for moderation before they are published, which is why yours was not immediately visible.
As I mentioned in my response to your original comment, I took your concerns seriously enough to test the recipe two more times before responding. I wanted to investigate what might have gone wrong and make any necessary updates to the instructions rather than respond without looking into the issues you raised.
I welcome constructive feedback, including negative reviews, and I have no problem acknowledging when a recipe needs clearer instructions. However, I would appreciate the same consideration before assumptions are made about how I manage my website or respond to reader feedback.