Oreo Snow Globes
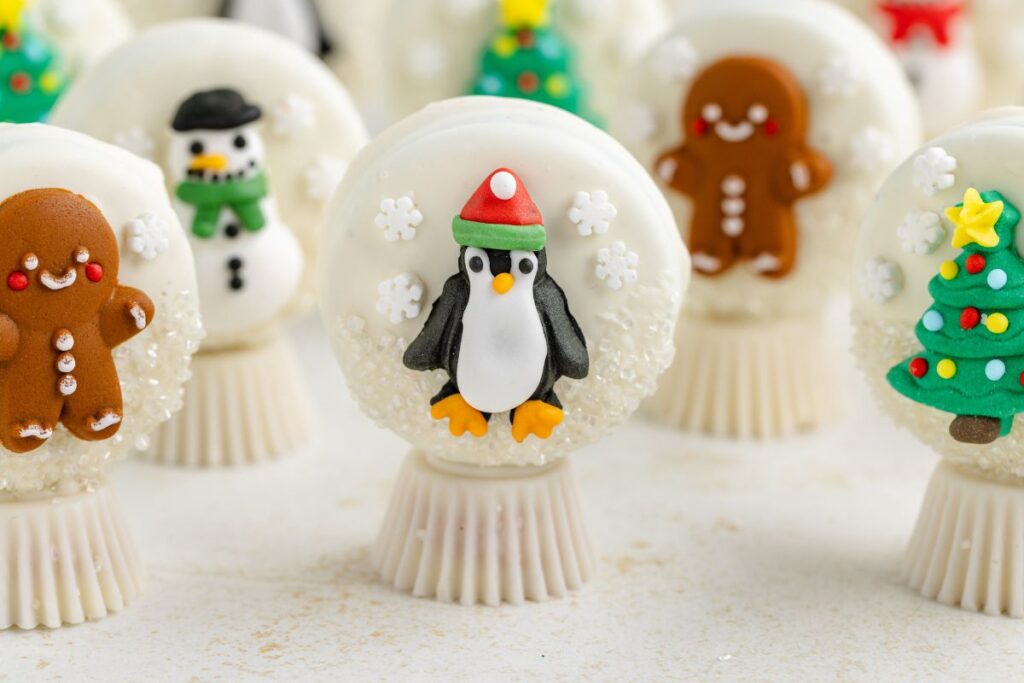
These Oreo Snow Globes are a fun and easy no-bake holiday treat. Made with just a few simple ingredients, they come together quickly and are perfect for adding a little festive charm to your dessert table.

Cute Oreo Snow Globes
I found the cutest Christmas tree icing decorations at Target last year, and I couldn’t resist grabbing them, even though I didn’t have a clue what I’d use them for at the time. They sat in my baking drawer for a while, waiting for inspiration to strike. This year, I when saw Oreo Snow Globes by Sugar and Soul in a Facebook group, I immediately fell in love with the idea. It was the perfect way to finally put those little Christmas trees to good use.
As you know, I’m all about keeping things easy, so I made a few tweaks to simplify the process. I used the limited-edition white fudge Oreos that come out during the holidays for the globe (I use the chocolate Fudge ones for my Oreo Reindeer) and paired them with white chocolate Reese’s miniature cups for the stand.
The combination made assembly super quick and easy. I couldn’t be happier with how these turned out! I added a couple to my holiday cookie trays this year along with my Chocolate Kiss Cookies, Peppermint Sugar Cookie Bars, and Peanut Butter Cup Reindeer. The snow globes were such a hit, everyone raved about how cute they looked.
Ingredients
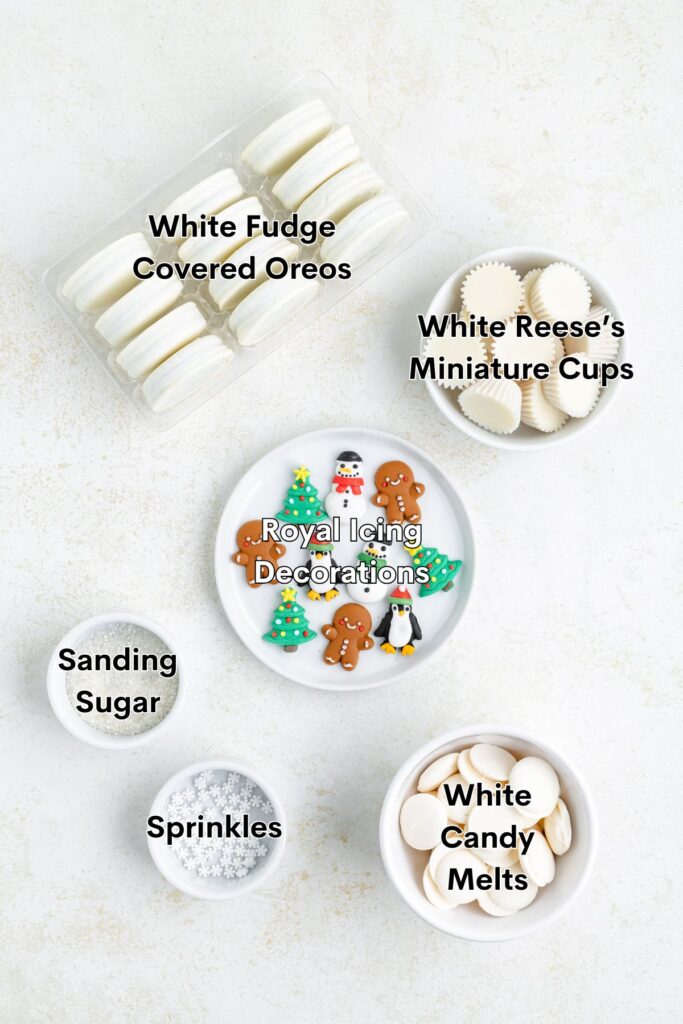
- White Fudge-Covered Oreos – The perfect “globe” with a smooth, white coating.
- White candy melts – Edible “glue” to hold everything together.
- Icing decorations – Festive and colorful centerpiece for the globes. Details of which brands I used and where I found them are below.
- Penguins and snowmen: Wilton brand purchased a Nob Hill supermarket
- Christmas trees: Favorite Day brand purchased at Target
- Gingerbread men: Sweet Shoppe brand purchased at Walmart
- White sanding sugar – Adds a sparkling “snow” effect.
- Snowflake sprinkles (optional) – Extra detail for a wintry touch.
- White Chocolate Reese’s Miniature Cups – Acts as the sturdy base for the snow globe.
Making the Oreo Ornament Cookies
- Prepare the workspace – Line a cookie sheet with parchment paper.
- Melt the ‘glue’ – Melt half of the candy melts according to the package directions.
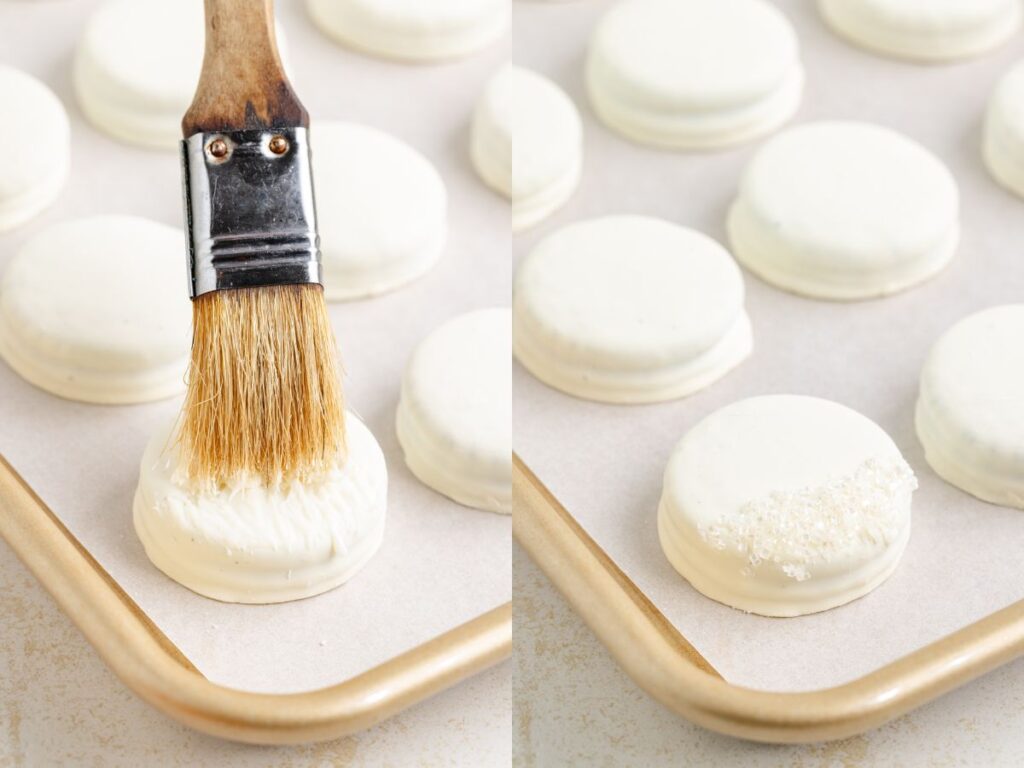
- Add the snow – Brush melted candy onto the bottom half of the front side of each Oreo and sprinkle with white sanding sugar.
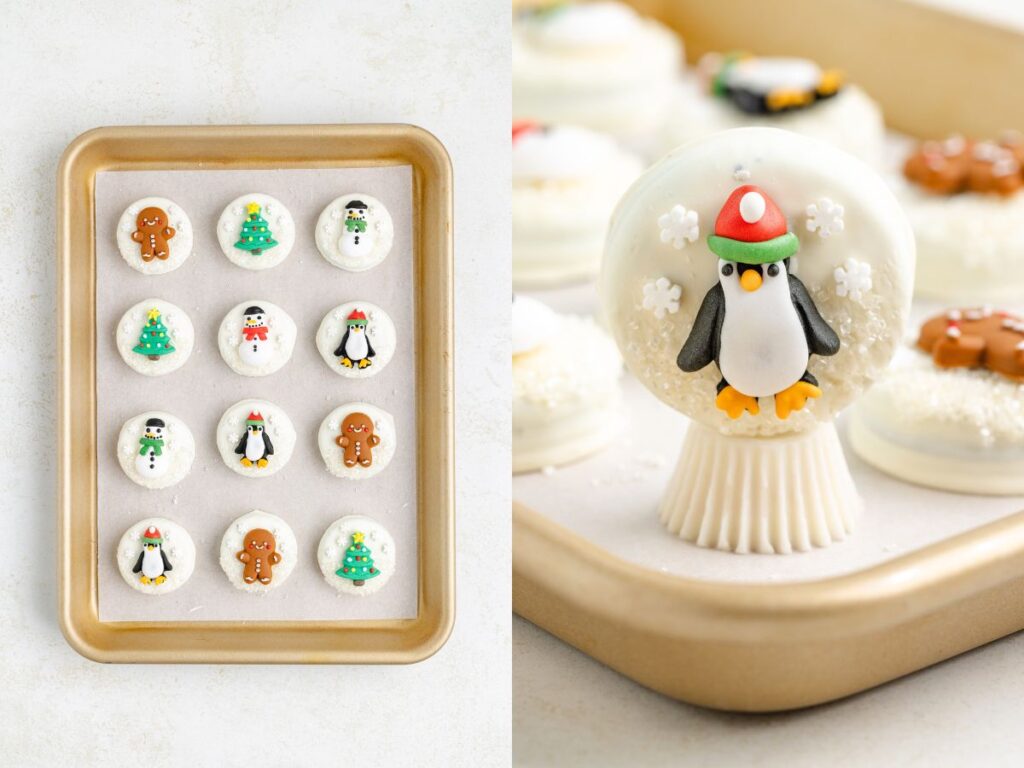
- Attach the main character – Brush melted candy onto the back of an icing decoration and press it onto the front of the Oreo over the sanding sugar.
- Optional sprinkles – If desired, add sprinkles using a dab of melted candy, then set the cookies on the prepared baking sheets to dry.
- Create the stand – Melt the remaining candy melts, dip the narrow, flat end of a Reese’s Miniature Cup into the candy, and attach it to the bottom of each Oreo to create the cookie globe.
- Let them dry – Allow everything to dry completely before serving or adding to cookie trays.
Variations and Substitutions
Make your own white Oreos – Dip regular Oreo cookies in melted white almond bark or white chocolate chips to replicate the fudge coating.
Base options – Use regular Reese’s miniature cups instead of white chocolate ones. For a festive touch, spray them with edible gold spray paint.
Snow alternatives – Swap the white sanding sugar with granulated sugar, white nonpareils, or other white sprinkles for different textures and looks.
Glue alternatives – Use melted white chocolate or white almond bark instead of candy melts for assembling the globes. Note that white chocolate often has a slightly yellow hue compared to almond bark or candy melts.
DIY decorations – If icing decorations aren’t available, pipe your own designs on parchment paper using colored candy melts. Let them dry completely before using them as you would store-bought icing decorations.

Tips for Success
- Use a pastry brush – A pastry brush makes it easier to apply an even layer of melted chocolate to the Oreos without making a mess.
- Add sugar immediately – For best results, sprinkle the sanding sugar as soon as the chocolate is brushed on to ensure it sticks before the chocolate hardens.
- Secure decorations firmly – Gently press icing decorations into the Oreos while the chocolate is still wet to ensure they stick properly.
- Work quickly with melted candy – Candy melts set fast, so have all your decorations and tools ready before starting. Reheat the melts in short intervals if they begin to harden.
- Dab chocolate with a toothpick – For precise placement, use a toothpick to dab small amounts of chocolate onto individual sprinkles or decorations.
- Let everything dry – Allow the candy melts and Reese’s base to set completely before handling to avoid smudging or detaching pieces.
- Use parchment paper – Place the snow globes on parchment to prevent sticking as they dry.

Storing the Cookies
Store the cookies in an airtight container in a single layer or with parchment or wax paper between layers to prevent the cookies from sticking for 1-2 weeks.
I don’t recommend freezing the decorated cookies as the icing decorations might bleed.

Want to be the first to know when the next Christmas cookie is published? Sign up for our newsletter updates below.
Looking for more no-bake desserts for the holiday season?
Check out these festive treats.
Did you love these adorable little Oreo snow globe cookies? Let me know what you think in the comments below.

Oreo Snow Globes
Ingredients
- 12 white fudge-covered Oreos 8.5 ounce package
- 12 Reese’s white creme miniature cups
- 1/2 cup white candy melts
- 1/4 cup white sanding sugar
- 12 festive icing decorations
- snowflake sprinkles optional
Instructions
- Melt 1/4 cup of the candy melts according to package directions.
- Using a pastry brush, brush the melted candy onto the bottom half of the front side of each Oreo. Immediately sprinkle with white sanding sugar.
- Brush a small amount of melted candy onto the back of each icing decoration and place it on the front of the Oreo over the sanding sugar.
- If using snowflake sprinkles, dab a small amount of melted candy onto each sprinkle with a toothpick and attach them to the Oreo. Set aside to dry.
- Once the decorations are dry, melt the remaining candy melts.
- Dip the narrow, flat end of each Reese’s Miniature Cup into the melted candy and attach it to the bottom of an Oreo to form a stand.
- Allow the snow globes to dry completely before serving or arranging on cookie trays.
Notes
- Store the cookies in an airtight container in a single layer or with parchment or wax paper between layers to prevent the cookies from sticking for 1-2 weeks.
- I don’t recommend freezing the decorated cookies as the icing decorations might bleed.
Nutrition
Disclaimer: Nutrition information is estimated based on automated calculations and should be considered as an approximation. These estimates are provided as a courtesy. Please use your own brand’s nutritional values to verify accuracy.

