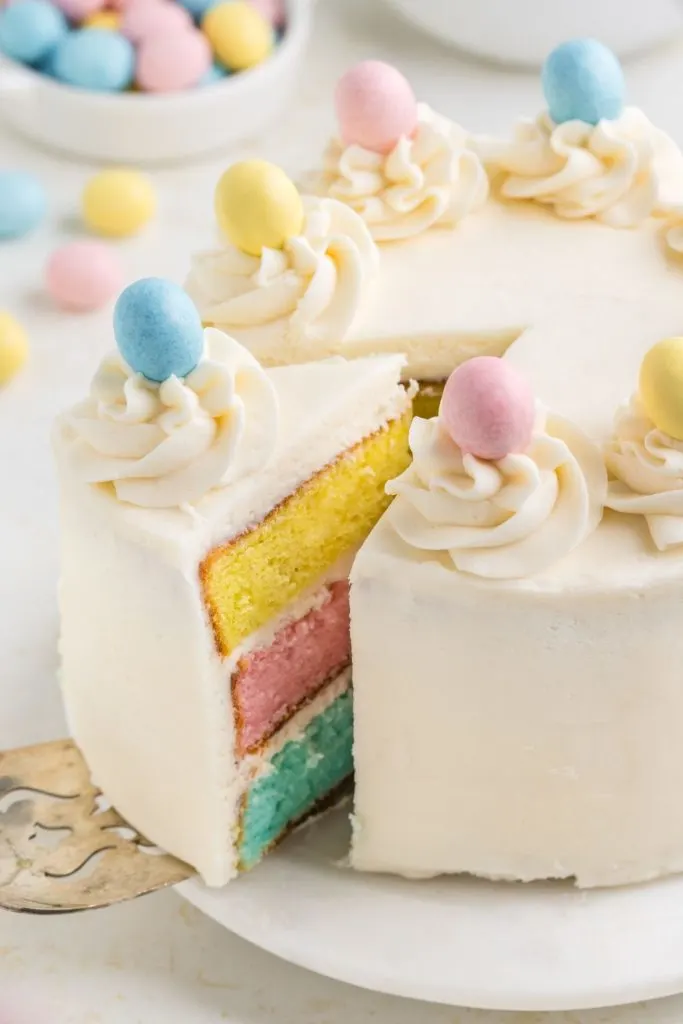
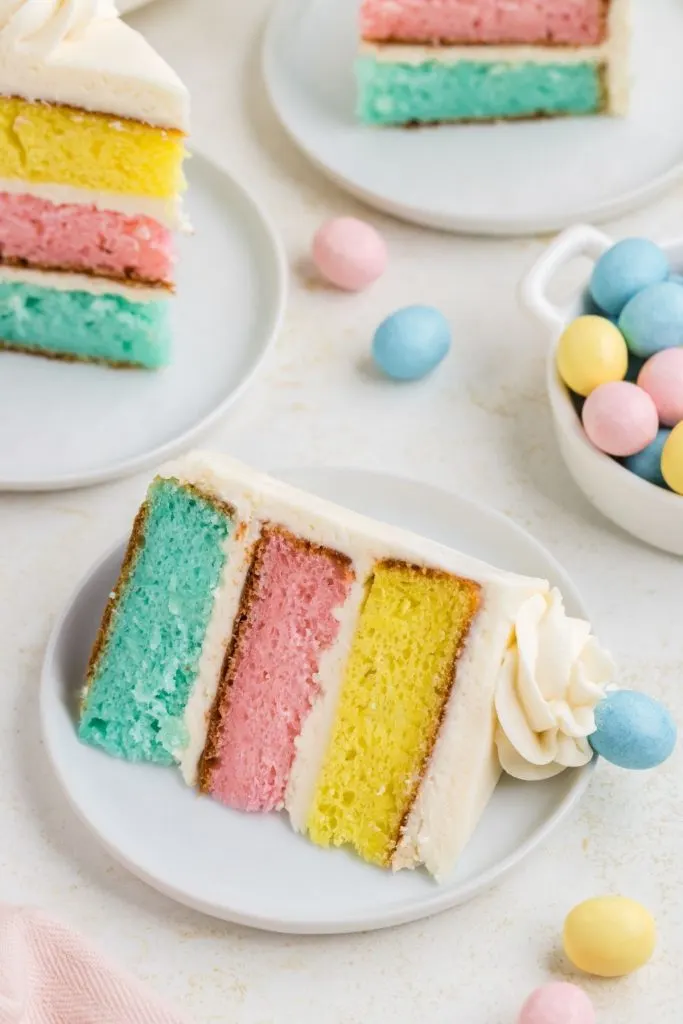
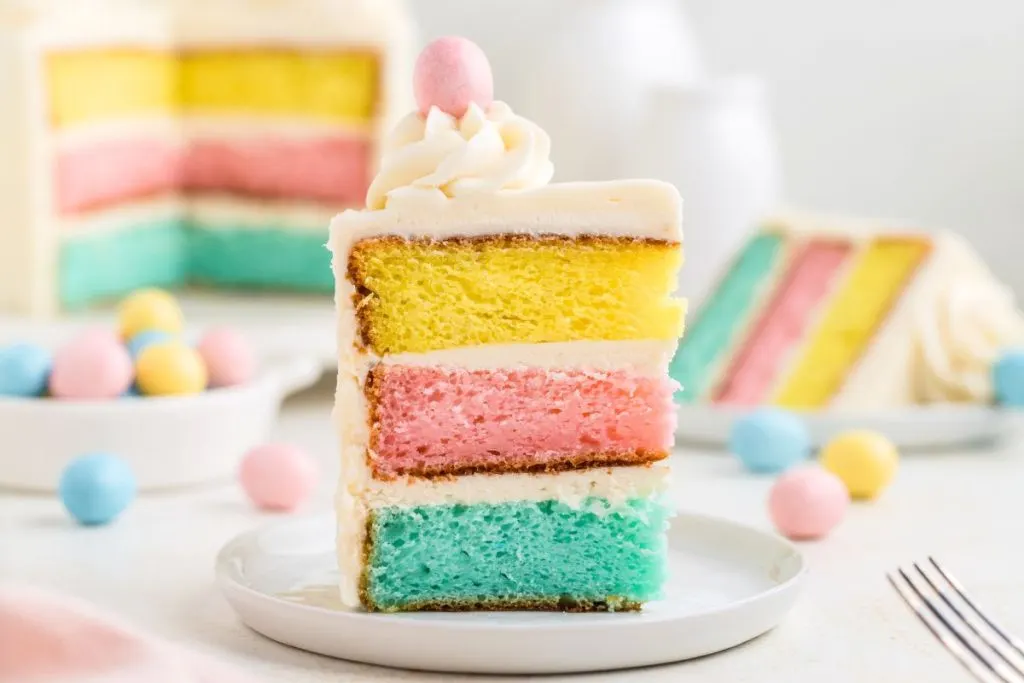
This Easter Layer Cake recipe is an easy and delightful way to impress your guests. A simple cake mix base is elevated by homemade buttercream layers and is bound to be the star on any Easter table.

Easy Easter Cake Recipe
As a fan of all things adorable when it comes to Easter desserts, I love the fun surprise tucked inside this cake – those colorful layers just make me smile! And let me tell you, despite how fancy it looks, whipping up this cake is a breeze, which is a massive win in my book, especially during the busy holiday hustle.
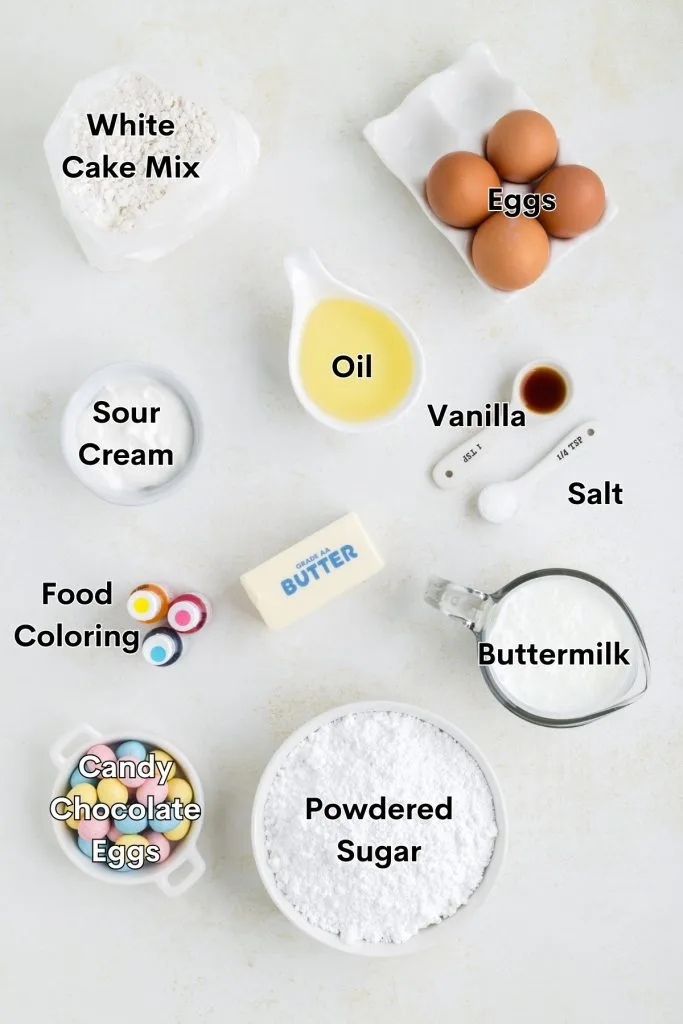
Ingredients for the Easter Layered Cake
Cake Layers
- White cake mix – Serves as a convenient base for the cake.
- Eggs and egg whites – Act as key binding agents, providing structure and moisture to the cake batter.
- Buttermilk – Infuses the cake with a subtle tanginess and contributes to its richness and tenderness.
- Canola oil – Adds moisture to the cake while ensuring a soft and tender crumb.
- Sour cream – Enhances the cake’s moistness and tenderness.
- Gel food coloring – Adds the color to the pastel-colored cakes. Gel food coloring is more vibrant than its liquid counterpart, so you can use less product.
Buttercream Frosting
- Butter – Provides a rich and creamy texture to the buttercream frosting.
- Powdered sugar – Sweetens and thickens the buttercream, creating a smooth and spreadable consistency.
- Vanilla – Enhances the flavor of the buttercream.
- Salt – Balances the sweetness of the buttercream.
- Milk – Adjusts the consistency of the buttercream, allowing for easy spreading and decorating.
- Candy chocolate eggs – Serve as a festive and colorful garnish, adding a touch of whimsy to the cake’s presentation.
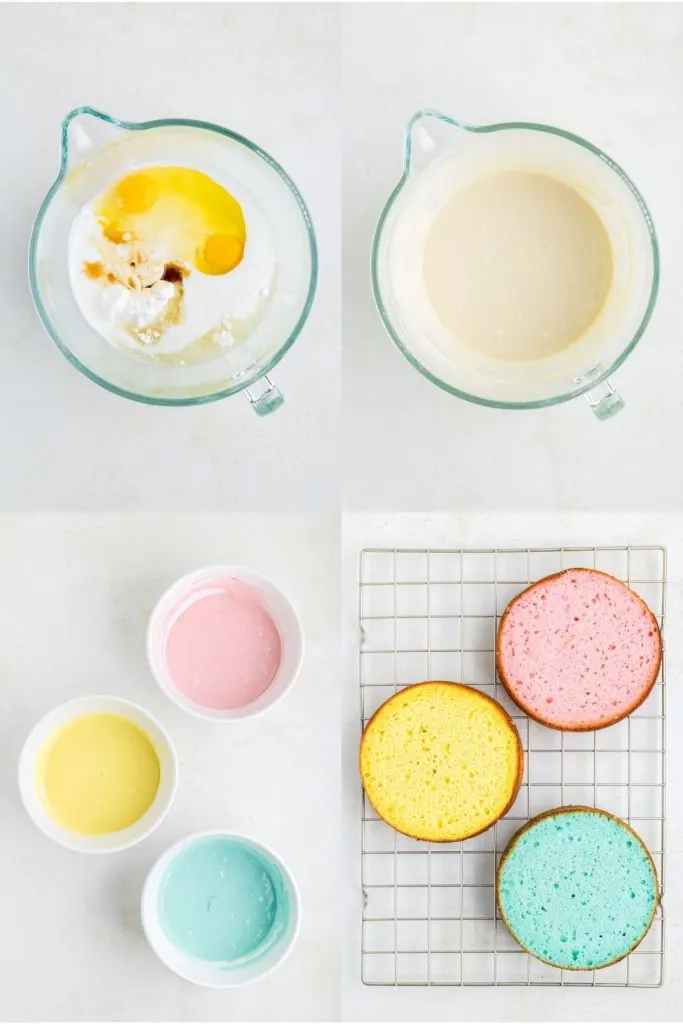
Making the Easy Easter Cake
Cake Layers
- Preheat and prepare pans – Preheat the oven to 350 degrees F. Line three 6-inch cake pans with parchment paper and generously grease the sides to ensure easy release.
- Mix cake batter – In a large mixing bowl, combine cake mix, buttermilk, canola oil, sour cream, eggs, and egg whites. Using an electric mixer, beat the mixture on medium speed for about 2 minutes until smooth and well combined.
- Color the batter – Divide the cake batter evenly into three separate bowls. To each bowl, add a few drops of food coloring to one bowl, and repeat with the remaining two colors and bowls. Stir each until the color is evenly distributed throughout the batter.
- Bake the cakes – Pour each colored batter into the prepared cake pans, ensuring each pan receives a different color. Bake for 22-27 minutes or until a toothpick inserted into the center comes out clean.
- Cool cakes – Allow the cakes to cool in the pans for 10 minutes before transferring them to wire racks to cool completely.
Frosting and Decorating
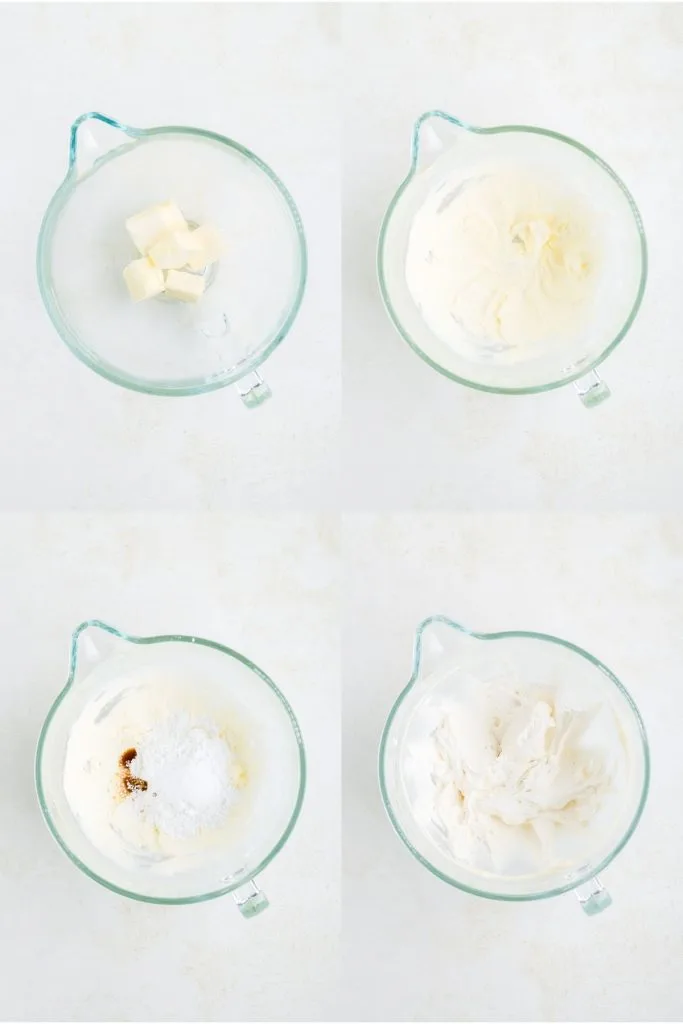
- Prepare buttercream – Once cooled, prepare the buttercream frosting. In a large bowl, beat the butter until smooth and creamy using a hand or stand mixer.
- Frosting consistency – Gradually add the powdered sugar, vanilla extract, and a pinch of salt, beating well after each addition until the frosting is smooth and fluffy. If needed, adjust the consistency by adding milk, 1 teaspoon at a time.
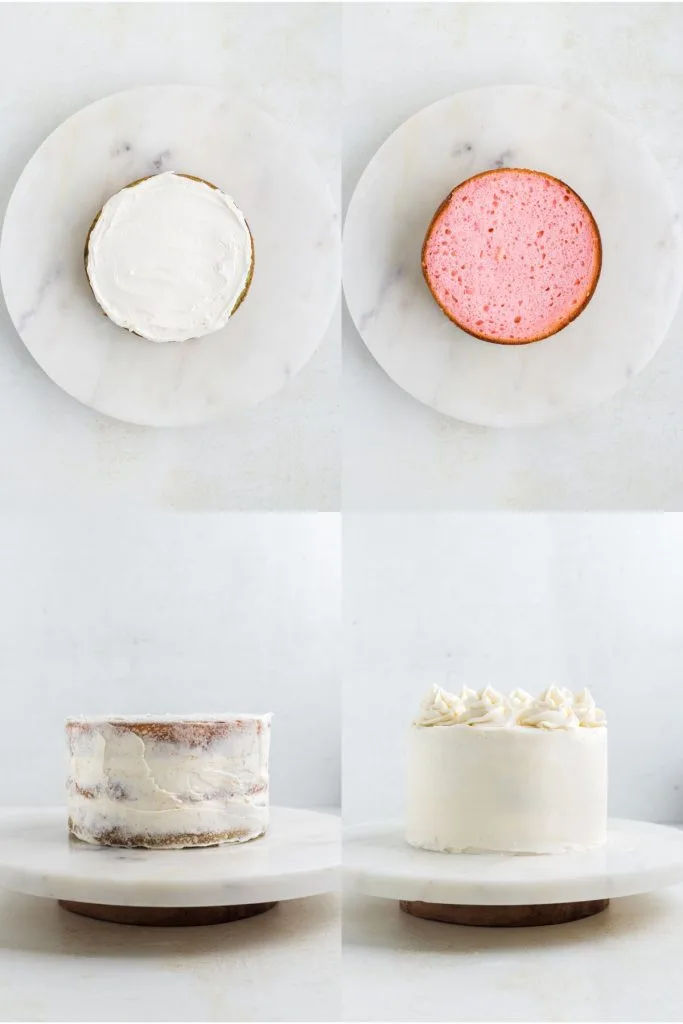
- Assemble the cake – Level the cooled cakes by slicing off the domed cake tops using a cake leveler or serrated knife. Place one cake layer on a cake stand and evenly spread about 1/2 cup of frosting over the top. Add the second cake layer and top with another 1/2 cup of frosting. Finally, place the final layer on top.
- Apply crumb coat – Apply a thin layer of frosting, known as a crumb coat, around the top and sides of the cake. Place the cake in the freezer for about 30 minutes to set.
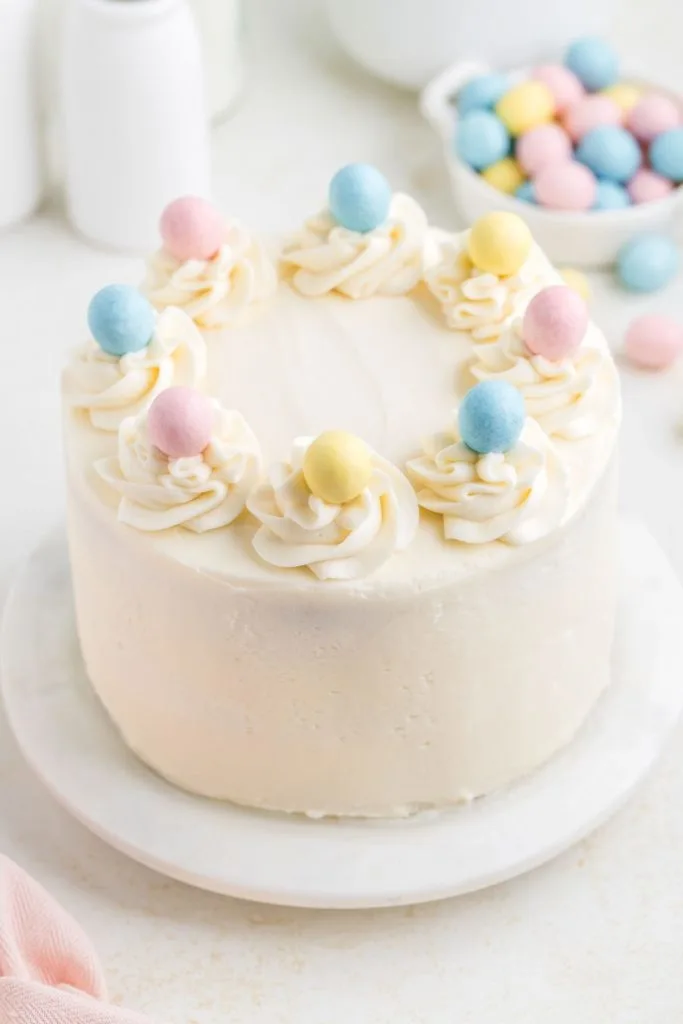
- Decorate with buttercream – Fill a piping bag fitted with a large star tip with about 3/4 cup of the remaining buttercream. Frost top and sides of the cake with the remaining buttercream using an offset spatula. Pipe decorative rosettes on top of the cake and place a candy-coated egg on each rosette.
- Serve and enjoy – Slice and enjoy your delicious cake!
Variations and substitutions
Whole milk – If you don’t have buttermilk on hand, you can substitute it with whole milk. The cake will still turn out moist and delicious, although with a slightly different flavor profile.
Homemade buttermilk – To make homemade buttermilk, add 1 tablespoon of white vinegar or lemon juice to a measuring cup, then add enough whole milk to make up one full cup. Allow the mixture to sit for 5-10 minutes before using it in the recipe.
Homemade white cake – If you prefer to use a homemade white cake recipe instead of a cake mix, feel free to do so! You can use your favorite homemade white cake recipe and adjust the quantities as needed to fit the three 6-inch cake pans.
Cream Cheese Frosting – For a tangy twist, consider using cream cheese frosting instead of vanilla buttercream. The cream cheese frosting will pair wonderfully with the colorful layers of the cake and add a deliciously rich flavor.
Change up the decorations – Get creative with the decorations! Instead of candy-coated eggs, you can use fresh flowers, chocolate curls, Easter sprinkles, or any other festive decorations that suit your preference and the occasion. Let your imagination run wild to customize the cake to your liking!
Tips for success
- Use a white cake base – Opt for a white cake mix instead of yellow to achieve pastel and Easter-like colors. Using a yellow cake mix can result in unintended colors (e.g., the blue layer turning green, the pink layer turning orange).
- Line the cake tins – Line the bottoms of the cake pans with parchment paper for easy removal of the cakes after baking. This prevents the cakes from sticking to the pans and ensures they come out cleanly.
- Level the cakes after baking – Once the cakes are baked and cooled, level them using a cake leveler or serrated knife to ensure an even surface for stacking and frosting.
- Cool cakes completely – Make sure the cakes are cooled completely before frosting them. Failing to do so can cause the frosting to melt and slide off the cake. Patience is key to achieving a beautifully decorated cake.
- Freeze the cake after applying the crumb coat – After applying the crumb coat, place the cake in the freezer for about 30 minutes to allow the frosting to set. This step helps to seal in the crumbs and create a smooth base for the final layer of frosting.
How to Store the Easter Chocolate Mousse Eggs
Store leftovers in an airtight container for up to 2 days at room temperature or 5 days in the refrigerator. If the cake has been refrigerated, allow it to come to room temperature for 30 minutes before serving.
The cakes can be made up to two days in advanced. Wrap the completely cooled cakes individually in plastic wrap and place in a resealable bag to store.
The unfrosted cakes can be frozen for up to three months. Allow the cakes to cool completely before wrapping each layer in plastic wrap and placing them in a freezer bag for storage. Allow the cakes to thaw at room temperature before frosting them.
The buttercream frosting can be made up to two days in advanced and stored in an airtight container in the refrigerator. Beat the buttercream with an electric mixer for a minute or two before frosting the cake.
Want to be the first to know when new easy recipes are released? Sign up for our newsletter updates below.
Looking for more delicious Easter desserts?
Why not add one of these great recipes to your Easter table this year.
- Chocolate Mousse Filled Easter Eggs
- Brownie Cookies with Mini Eggs
- Slow Cooker Easter Candy Clusters
Did you love this beautiful easter cake recipe? Let us know your thoughts in the comments below.
Easy Easter Layer Cake with Cake Mix
Ingredients
Cake Layers
- 1 (15.25 ounce) box of white cake mix
- 2 large eggs
- 2 large egg whites
- 1 cup buttermilk
- 1/2 cup canola oil
- 1/4 cup sour cream
- blue, pink and yellow food coloring
Buttercream Frosting
- 1 1/2 cups unsalted butter room temperature
- 5 1/2 cups powdered sugar
- 1 tablespoon vanilla extract
- 1/2 teaspoon kosher salt
- 2-4 teaspoons milk if needed
- candy Eggs for garnish
Instructions
- Preheat the oven to 350 degrees F. Line three 6-inch cake pans with parchment paper and grease the sides.
- Combine the cake mix, buttermilk, oil, sour cream, eggs and egg whites in a large bowl and beat with an electric mixer for 2 minutes on medium speed.
- Divide the cake mix into three even portions in separate bowls. Add a few drops of blue food coloring to one bowl and mix until well combined. Repeat the process with the remaining batter with the pink and yellow food coloring.
- Pour the batter into the prepared cake pans (one color per pan) and bake for 22-27 minutes or until a toothpick inserted into the center comes out clean.
- Allow the cakes to cool in the pan for 10 minutes before turning out onto a wire rack to finish cooling.
- Once the cakes have cooled completely, prepare the buttercream. In a large bowl, beat the butter with a hand or stand mixer until smooth and creamy.
- Add the vanilla, salt and powdered sugar 1 cup at a time, beating well after each addition until smooth and creamy. If needed, add milk 1 teaspoon at a time until the desired consistency is reached.
- Level the cakes with a cake leveler or serrated knife. Place one cake on a cake stand and spread 1/2 cup of frosting over top. Add a second cake layer and top with another 1/2 cup of frosting. Add the third layer of cake and apply a thin crumb coat of frosting to the top and sides of the cake. Freeze the cake for 30 minutes or until the crumb coat is firm.
- Add 3/4 cup of butter cream to a piping bag fitting with a large star piping tip of your choice and set aside.
- Frosting the top and sides of the cake with the remaining butter cream. Pipe rosettes on top of the cake and place a candy coated egg on top of each rosette.
- Slice and enjoy!
Notes
- Store leftovers in an airtight container for up to 2 days at room temperature or 5 days in the refrigerator. If the cake has been refrigerated, allow it to come to room temperature for 30 minutes before serving.
- The cakes can be made up to two days in advanced. Wrap the completely cooled cakes individually in plastic wrap and place in a resealable bag to store.
- The unfrosted cakes can be frozen for up to three months. Allow the cakes to cool completely before wrapping each layer in plastic wrap and placing in an freezer bag for storage. Allow the cakes to thaw at room temperature before frosting them.
- The butter cream frosting can be made up to two days in advanced and stored in an airtight container in the refrigerator. Beat the buttercream with an electric mix for a minute or two before frosting the cake.
Disclaimer: Nutrition information is estimated based on automated calculations and should be considered as an approximation. These estimates are provided as a courtesy. Please use your own brand’s nutritional values to verify accuracy.

